
Synopsis
Miles from civilization, it’s just you against nature. Can you survive in the wilderness and find your way back home?
For walkthroughs on Survival Island, scroll down.
Note: Only Episodes 1, 2, 3, and 4 are currently available on desktop and mobile. For the full version, you can play it on Steam or with AS3 Flashpoint.

or April 17, 2014 (for all)
Common Room: N/A
Preceded by: Monster Carnival Island
Succeeded by: Mission Atlantis Island
Resources on this page: Island Extras | Synopses from Poptropica | Quippy’s Store Items | Video Walkthrough | Written Walkthrough | Album Photos | Trivia
Island Extras: Official Tour | Video Playlist | Champions Map 1, 2, 3, 4, 5 | Lost Cubs Mini Quest


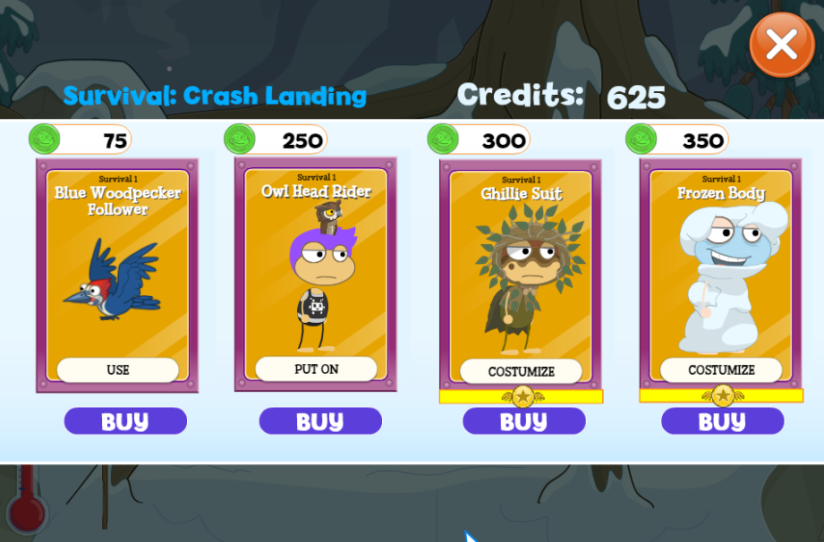
Quippy’s Store Items
Quippy sells the following items at the frozen pond under the big tree to the right in Episode 1: Blue Woodpecker follower, Owl Head Rider, Ghillie Suit*, and Frozen Body power*. (* = members only)
Video Walkthrough
Click through the playlist menu to find the video for different episodes. For a written walkthrough with pictures, scroll down on this page.
Written Walkthrough
Walkthrough by Samwow5 & HPuterpop
Special thanks to: Pixel, Slanted Fish, & Brave Tomato
Table of Contents
- Episode 1: Crash Landing
- Episode 2: Hook, Line, and Sinker
- Episode 3: Distress Signal
- Episode 4: Cabin Fever
- Episode 5: Escape!
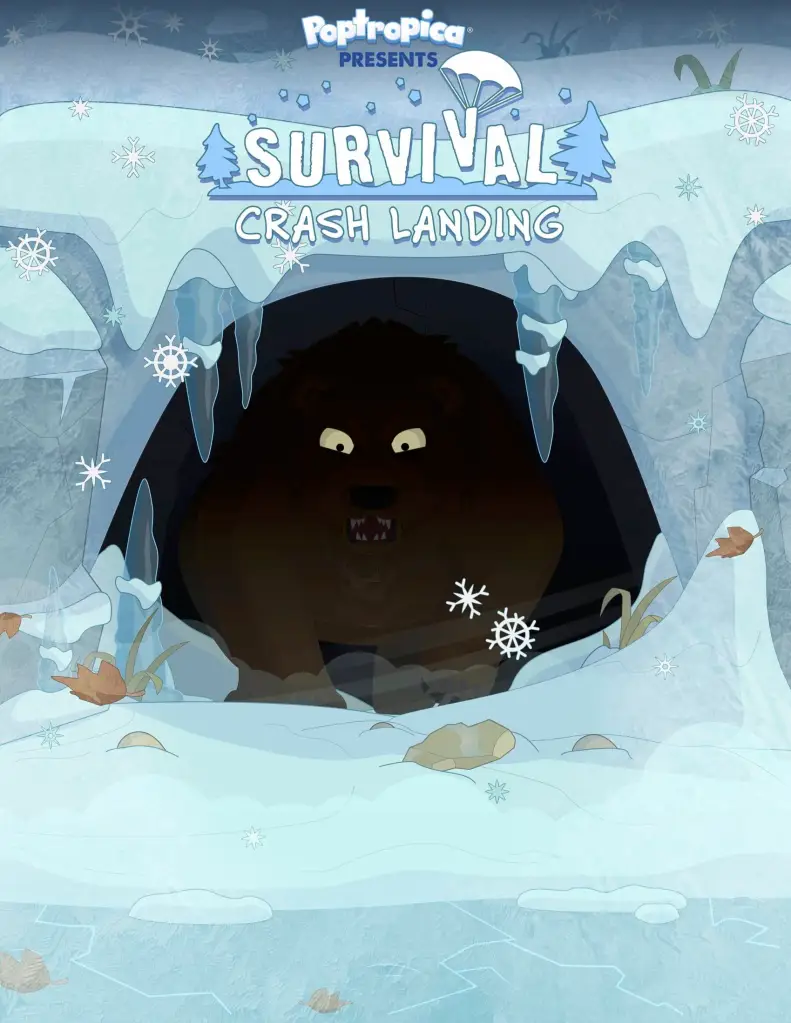
Episode 1: Crash Landing
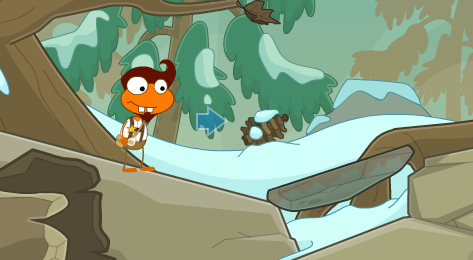
It’s a dark and stormy night… you’re riding in your blimp, and a thunderstorm is raging all around you. Disaster strikes, and the next thing you know, you’re stuck in a tree. You’ve got to get out immediately and start a fire to warm yourself up. Click on your parachute, and you’ll descend onto the snow.

Tip: If you don’t move for a long period of time, your temperature will drop. To keep your temperature up, run around so you don’t get too cold.

Throughout the island, you can pick up handbook pages that will give you hints for starting a campfire. First, go left and pick up the Survival Handbook.

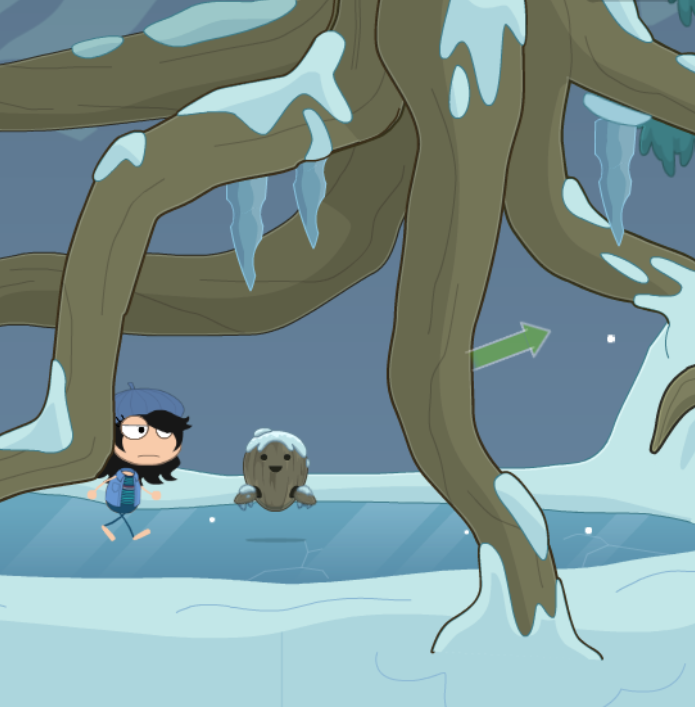
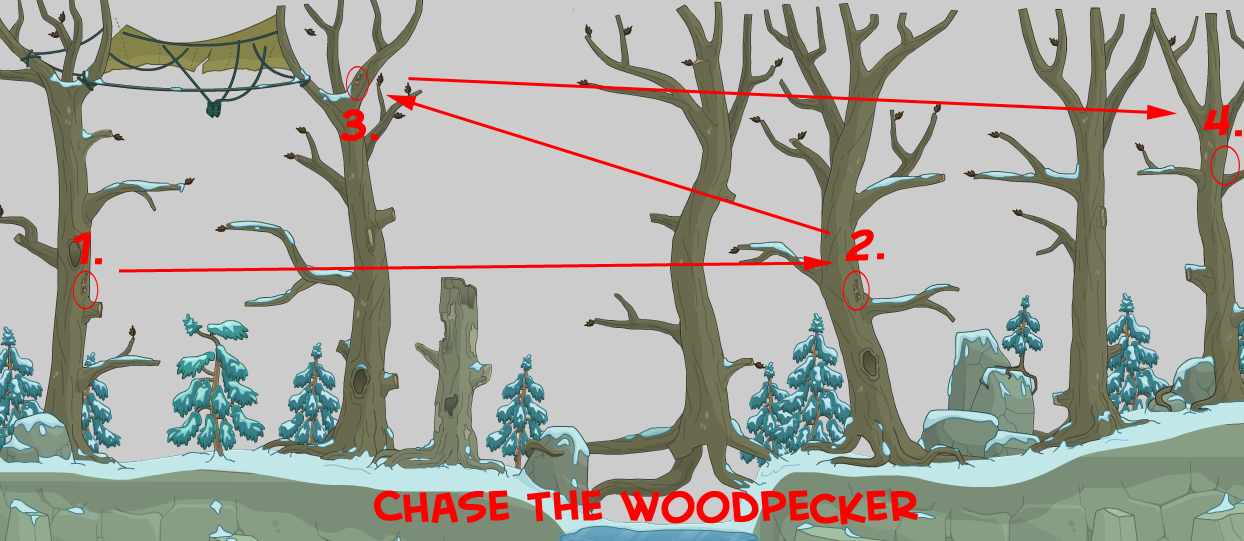
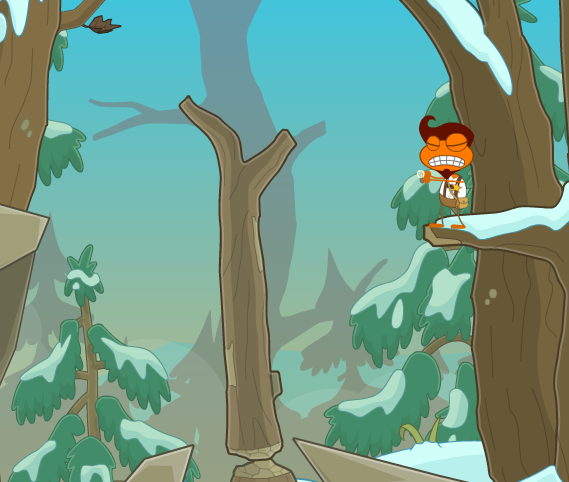
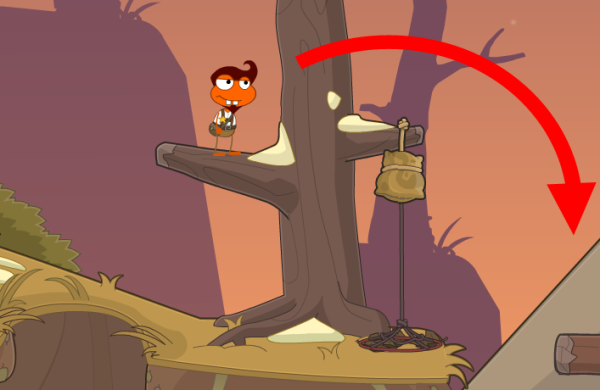
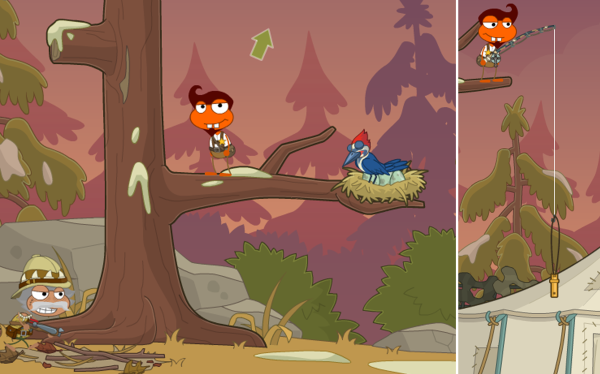
Next, hop up and scare the woodpecker away. Follow the woodpecker’s pecking sound (or use the pic below to trace its path). Jump onto the weak-looking branch attached to the dead tree, which will break. Pick up the fallen Logs.
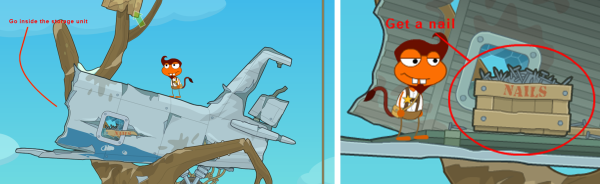
Keep following the woodpecker until it reaches the branch where a squirrel is sitting. Click on the squirrel to make him go inside the tree. When it hears the woodpecker, the squirrel will jump off, and you can pick up the Nest.
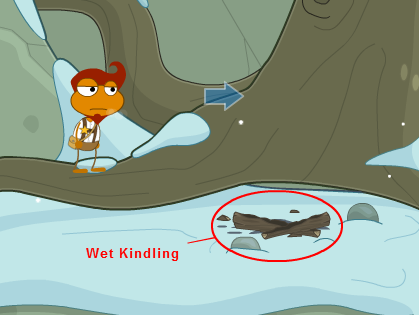
Go right to the next area, run to the right, and pick up the Wet Kindling.
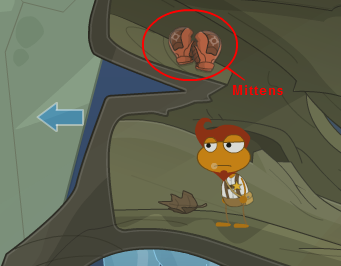
Next, go right to the next area. Run across the fallen tree and hop into the hole. Go left and pick up the Mittens. These will keep your body temperature warmer, so put them on!
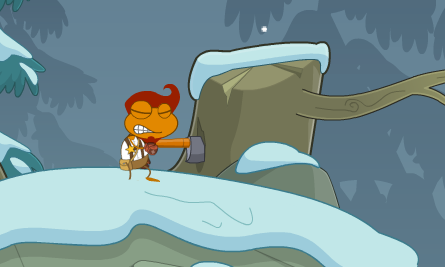
Now go left to the next scene, and walk left to find an axe sticking out of a tree stump. Your mittens will give you a grip to pull out the Axe Handle.
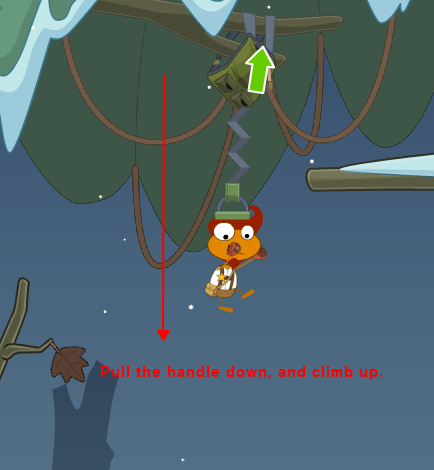
Next, climb the trees until you find a green parachute backpack hanging on a branch that’s slightly out of reach. Jump up and pull the backpack handle down. Now you’ll be able to climb up to the the branch and continue to the right.
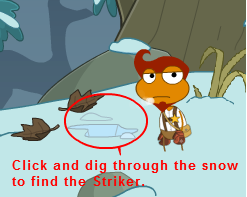
You will find a backpack hanging on a limb. Click on it, and an object will fall out. Climb down and click on the hole in the snow. Dig through it with your mittens to obtain the Striker. Then head back right to where you found the mittens.

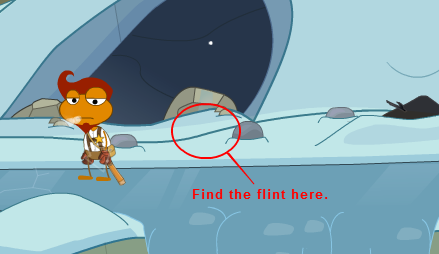
Equip the Axe Handle in your inventory and click on the boulder on the far right. It will roll down the hill and reveal a secret cave. Next to the cave entrance is a sparkling piece of Flint for you to take.
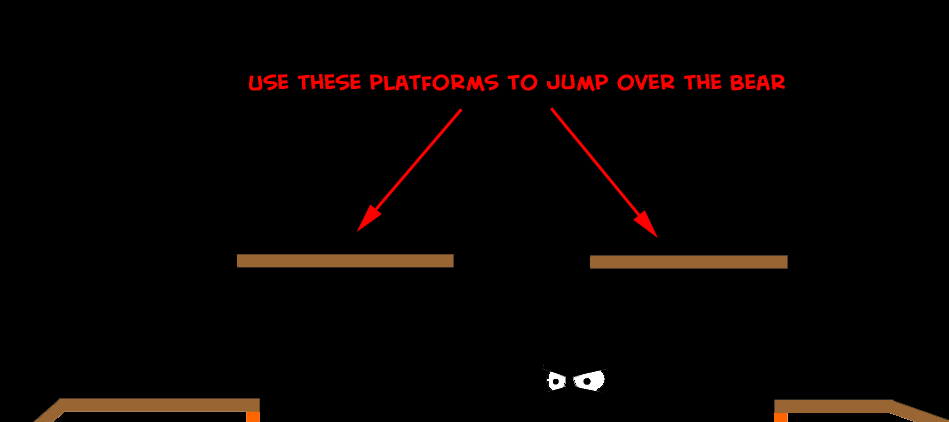
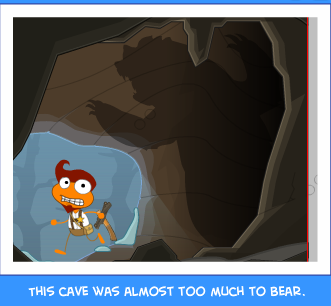
Enter the cave. A bear is sleeping inside! 🐻 This part is tricky — the bear is hidden in the darkness, but there are two hidden platforms above the bear that you need to hop onto so that you won’t disturb its slumber. Watch where the dripping water lands; that’s where the hidden platforms are located. Here’s a picture for reference (the eyes indicate where the bear is):
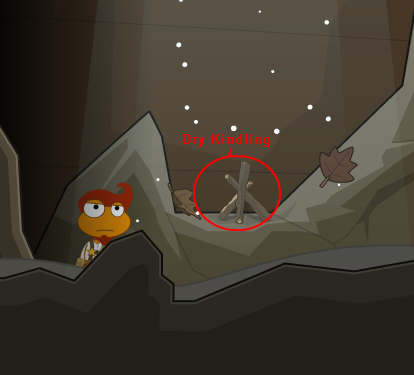
Once you’ve made it safely across, continue onwards to the far right and pick up the Dry Kindling. Then jump over the bear a second time and exit the cave. With the Axe Handle equipped, push the boulder further down the hill.
Now we’re ready to build a fire! Go behind the boulder and click on the fire symbol in the lower left corner.
Use your mittens to clear the snow off the ground. Put the nest down and strike it (with the Striker). Next, click on “blow on the fire,” then put the Dry Kindling down (far left). Lastly, place the Logs on top.
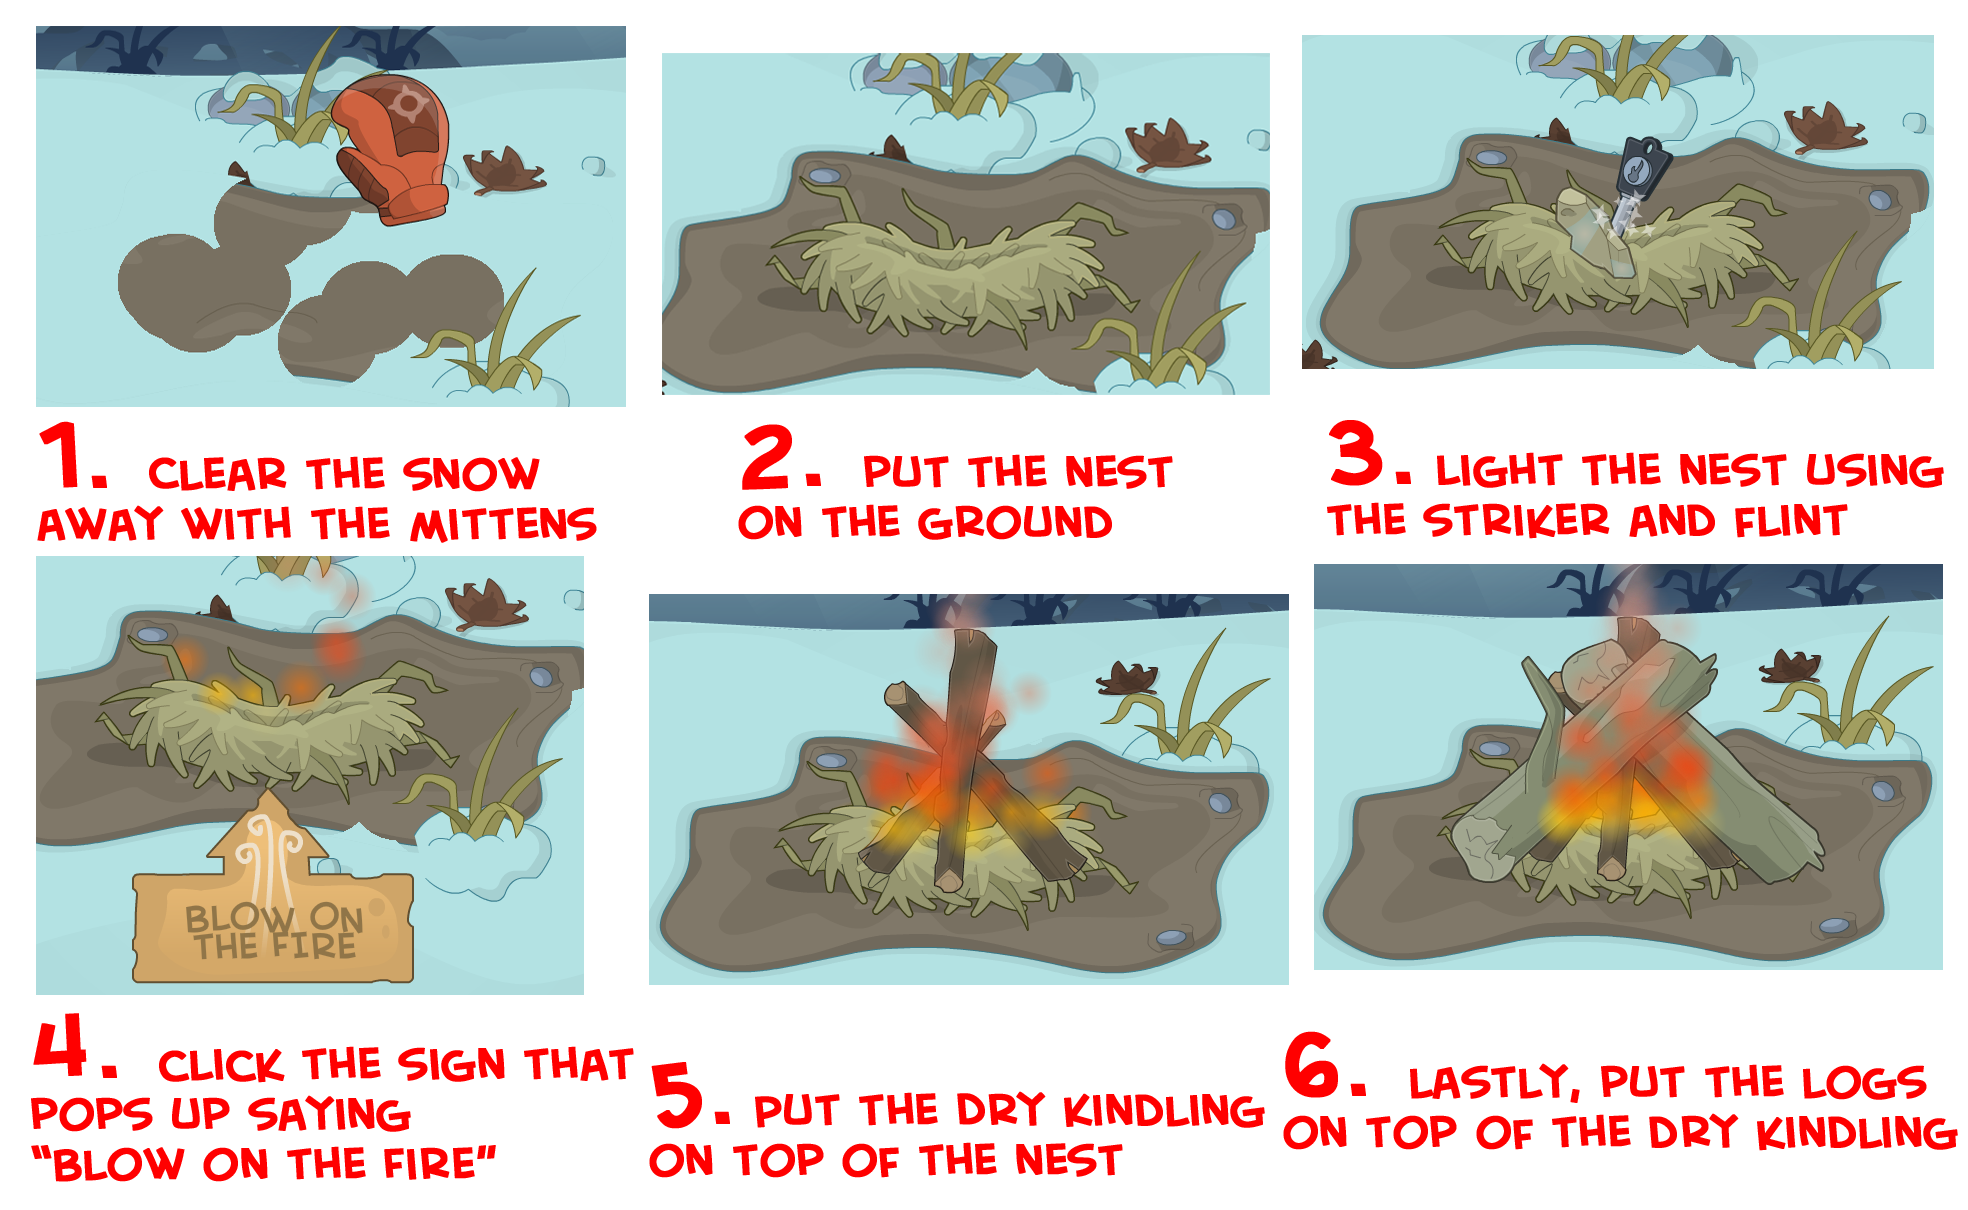
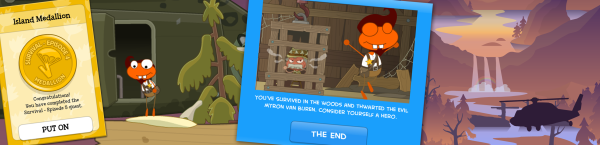
A fire will successfully start up! 🔥 At this point, you’ll be awarded the Episode 1 Medallion. Congrats!
You’ve survived the night, but what happens next? As you find rest, binoculars zoom in on you, revealing that you’re not alone…

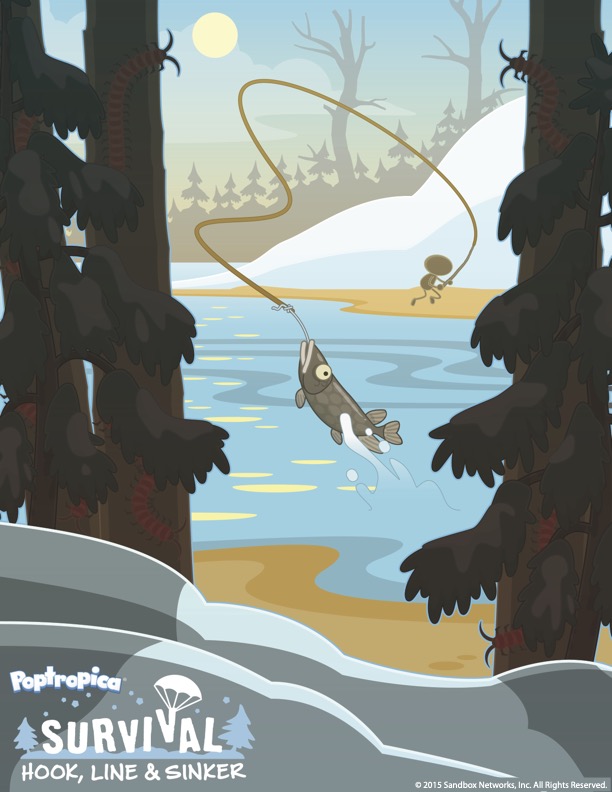
Episode 2: Hook, Line, and Sinker
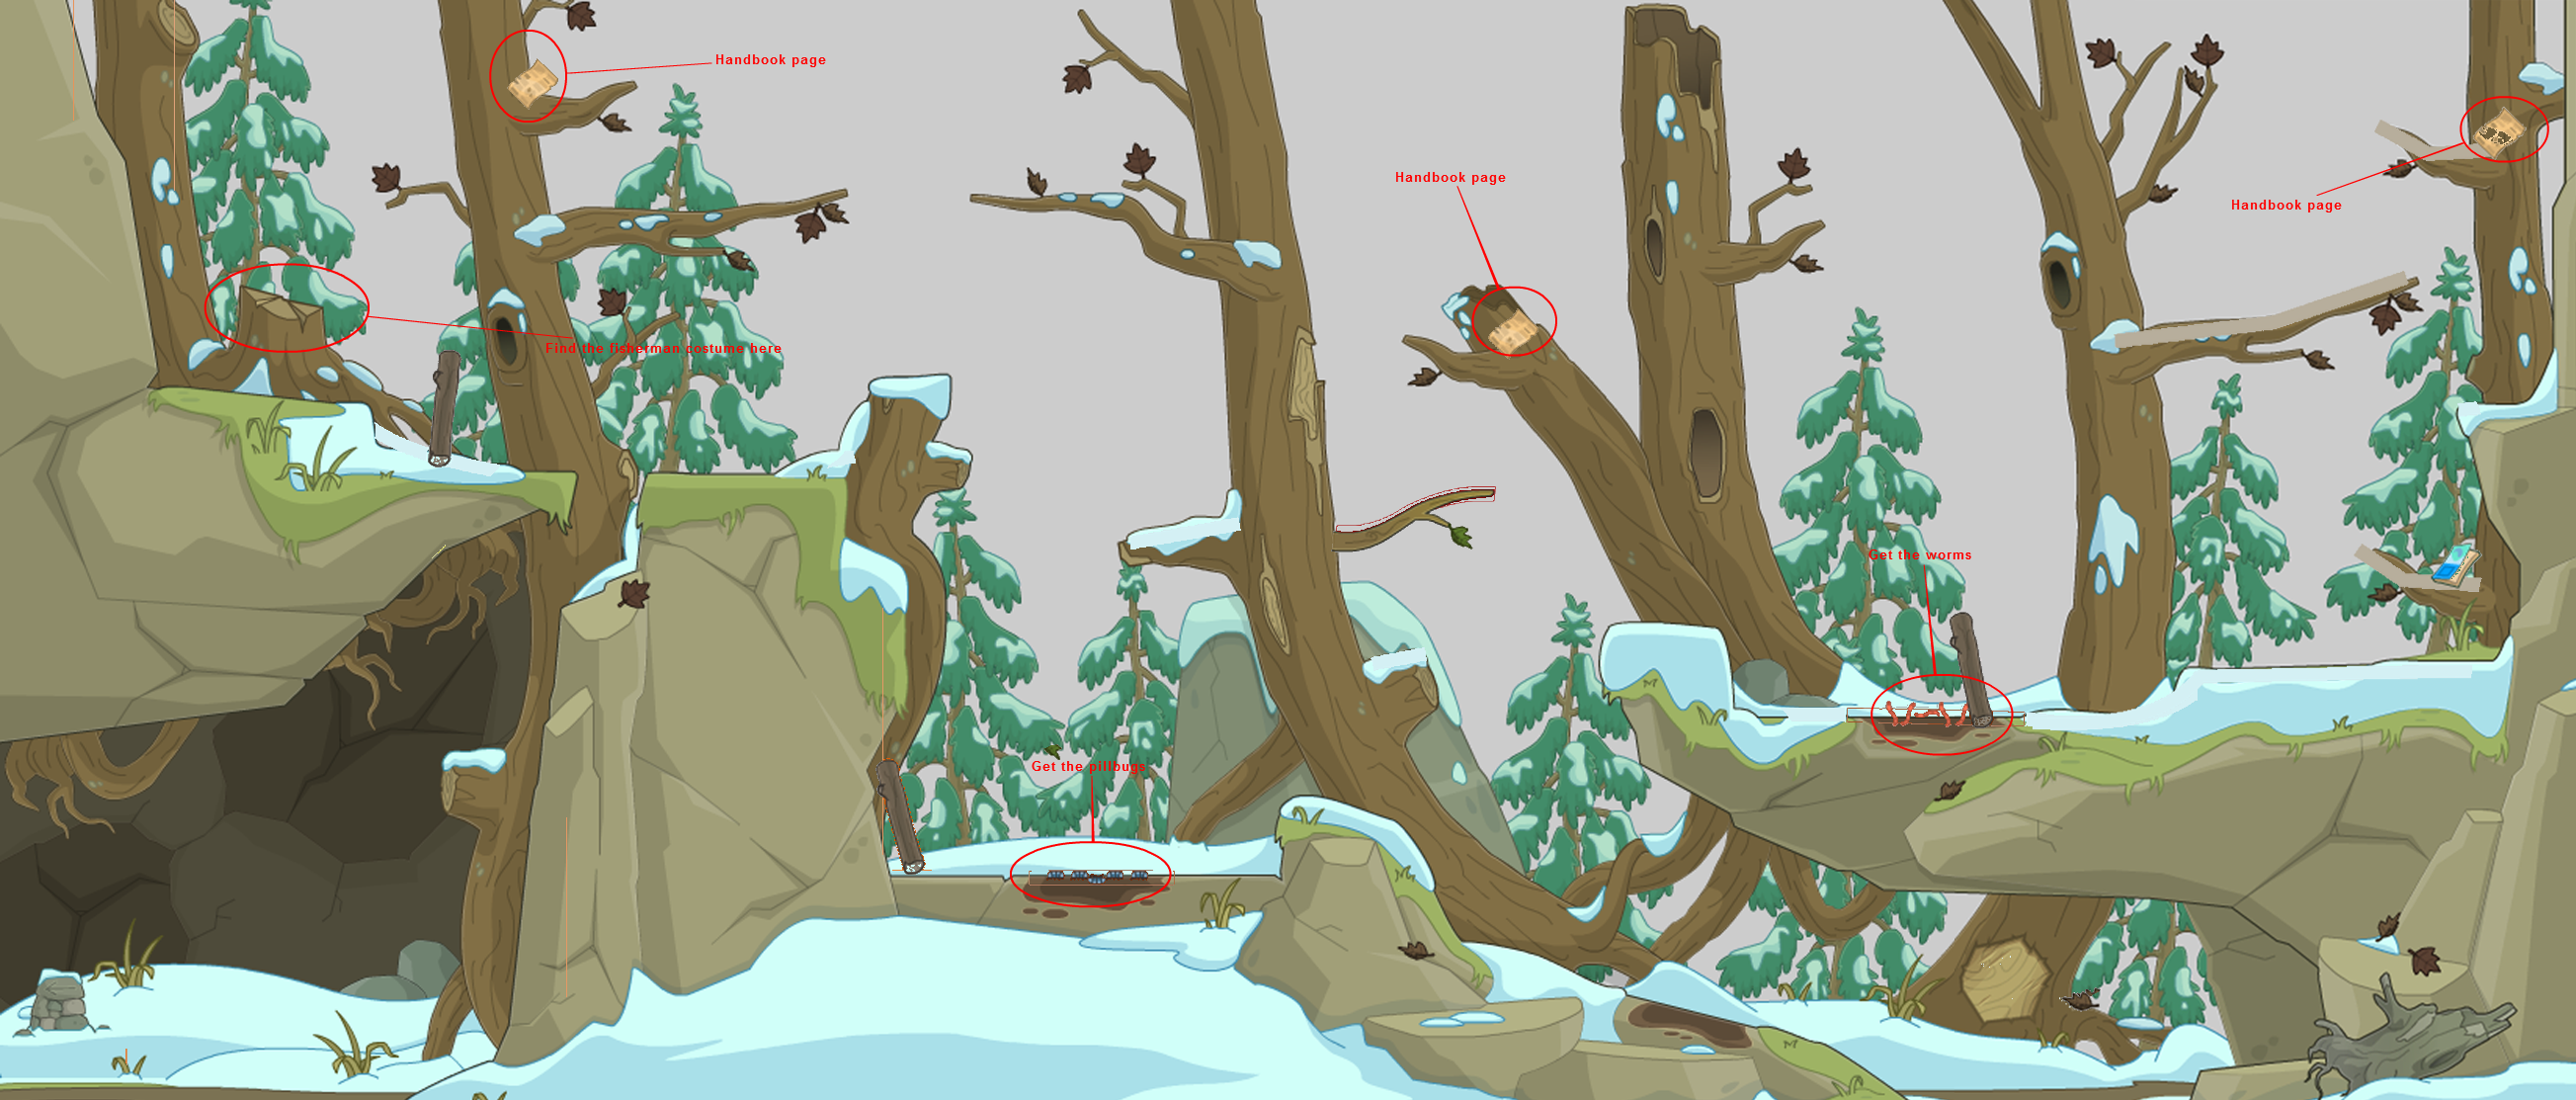
A cutscene will show you climbing down the cliff into a new day. Like the previous episode, you can find optional handbook pages throughout the island.

In the first area, you can also find Pillbugs, Worms, and an optional Fishing Suit on the various trees. After getting everything, find the log on the left and click on it to roll it over, allowing you to hop down and into the next scene.
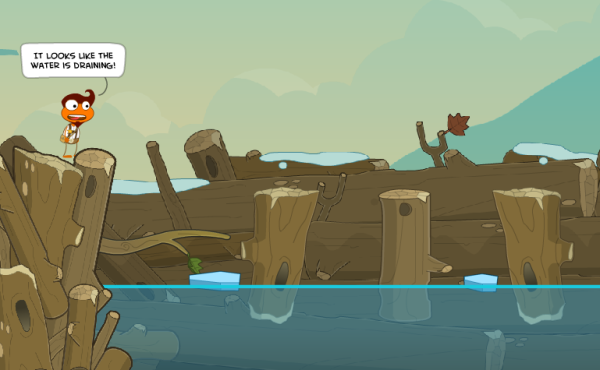
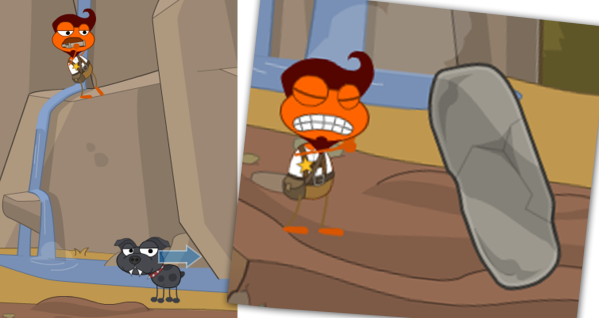
Here you’ll see a beaver’s nest with a hook inside! You won’t be able to reach it because the water level is too high. To lower it, jump on the dam to shake up the soil and open the holes, releasing the water.
The beavers will try to plug the holes back, so jump on the wood floating above the beavers to knock them on their head, and make them go away. They will continue to come back after some time, so keep them away from the holes until the dam is drained. Remember not to freeze in the cold water!
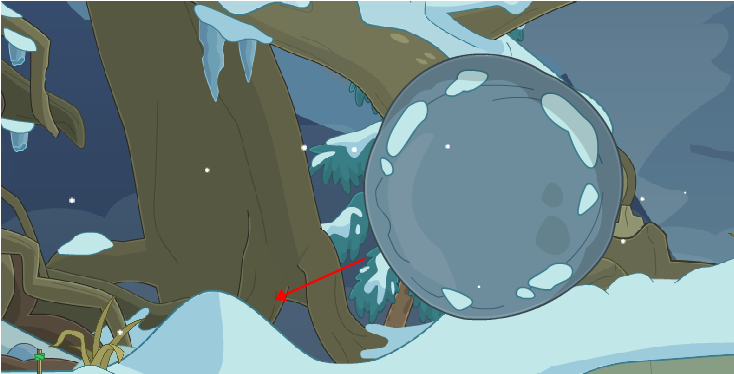
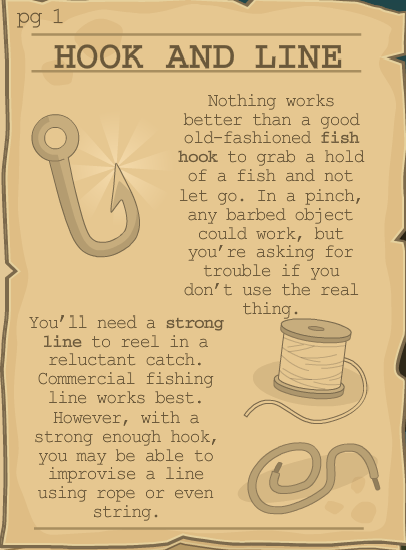
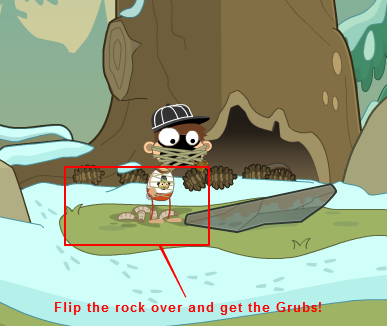
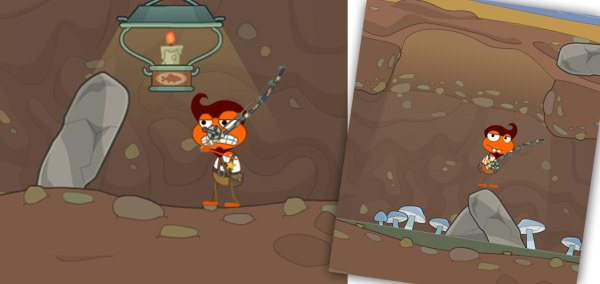
Once the water has drained, take the Hook from the nest. Next, go left and until you see this rock (pictured below). Roll it over and take the Grubs!
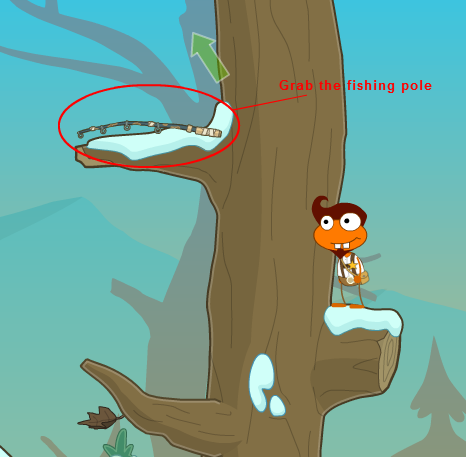
Continue to the next area and grab the Fishing Pole from the top branch of the first tree. Then find the two springy branches above the frozen river to jump across it, and push the flat rock over to right until it fits into the nearby hole.
Find the broken branch to the left and push it down, making a bridge. Run across and push the boulder down the hill, breaking the ice that had been covering the frozen river. Now you can continue left.
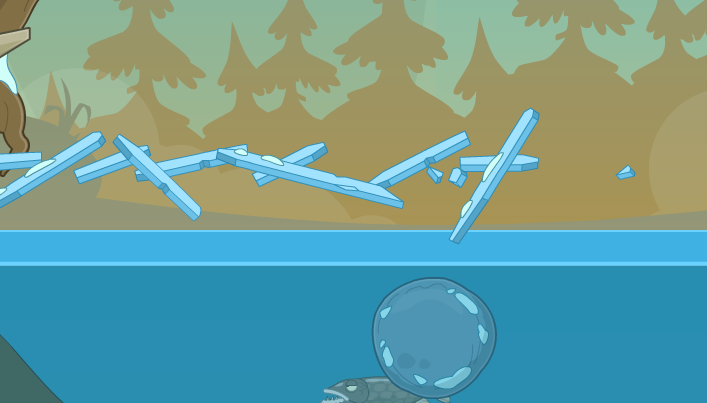
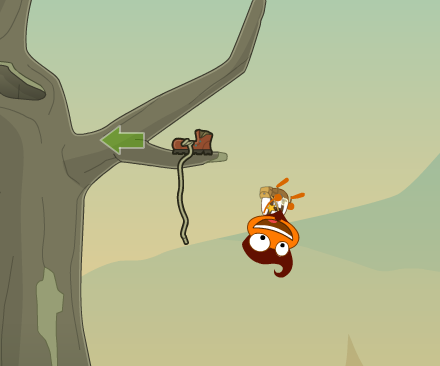
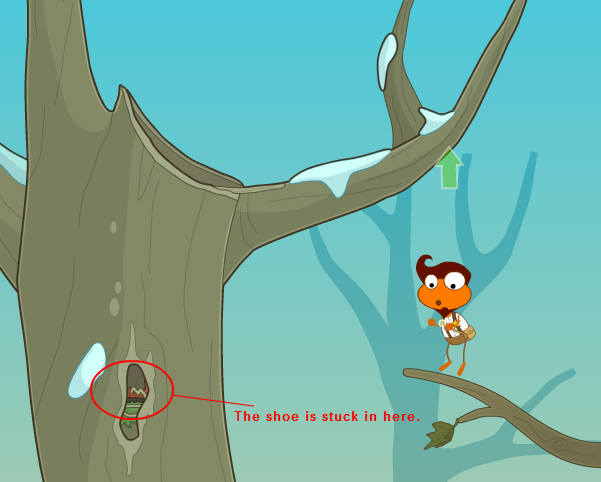
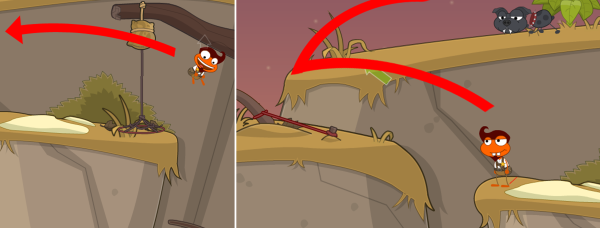
Push over all the weakened tree trunks, from the first up to the last. The last one will fall into the water below and make a raft. Jump on to float to the middle of the river. When you reach the tree with the shoe stuck in it, jump up and grab the Shoelace!
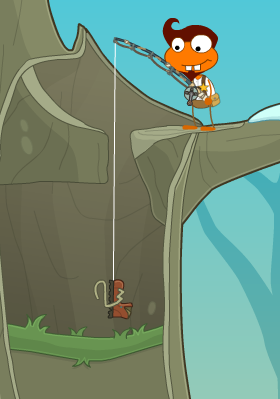
Then go left and jump onto the highest branch of the tree with the shoe. Position yourself right next to the opening of the tree, then go to your inventory and click “Use” on the shoelace to add it to the fishing pole. Next, click “Use” on the hook to add that as well. Now equip the fishing pole and press the space bar to drop it down, pulling up another Shoelace!
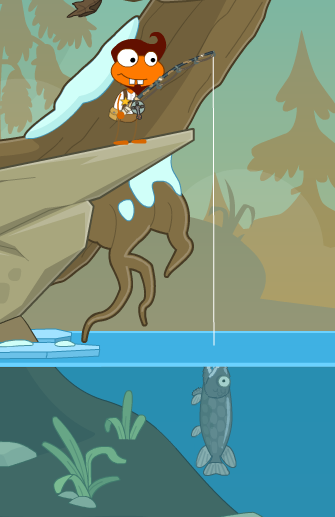
Return to the river with fish in it, and click “Use” on the second shoelace, combining it with the fishing pole. Now use the worms from earlier, and press the space bar next to the river to drop a line. When a fish bites, press the space bar again to pull it up. Success! You’ve found food for yourself and have earned your Episode 2 Medallion!
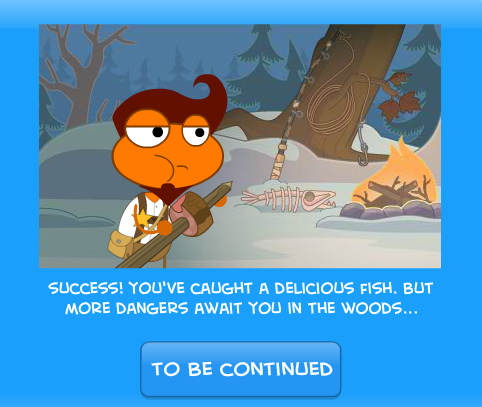
Next, a cutscene will show a surveillance cam zooming out, hidden in the trees. Turns out it’s only one of multiple cameras on a big screen. Who is watching?
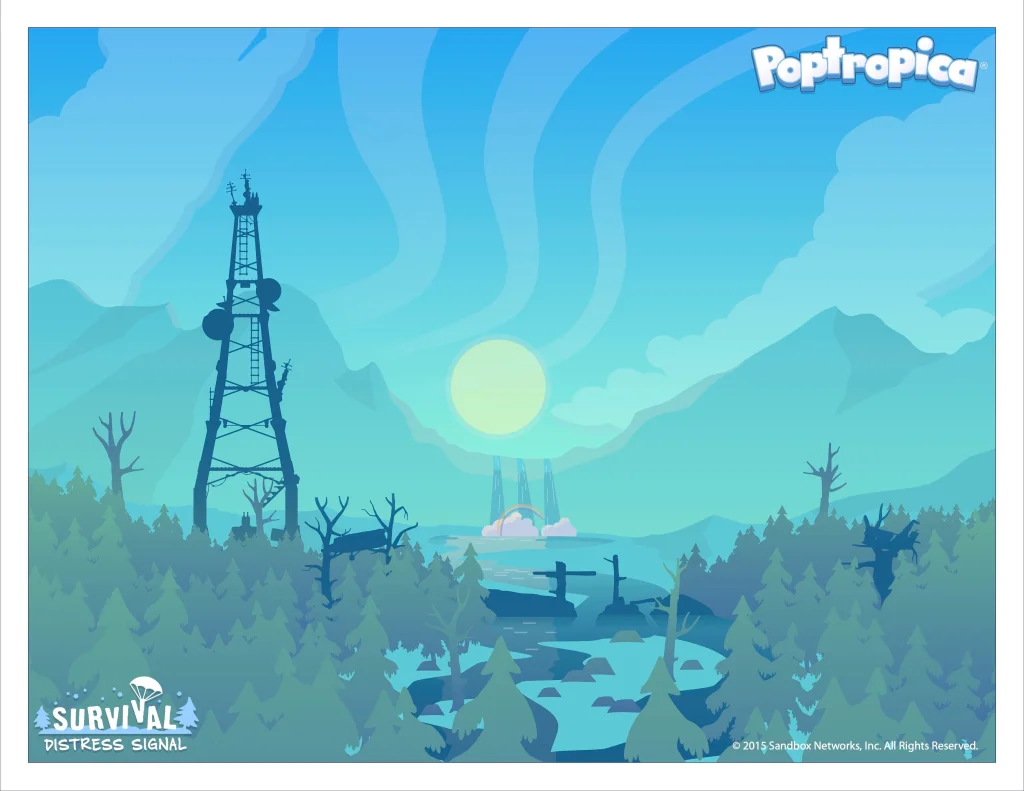
Episode 3: Distress Signal
An abandoned radio tower is in sight — now, you’ve got to find a way to use it.

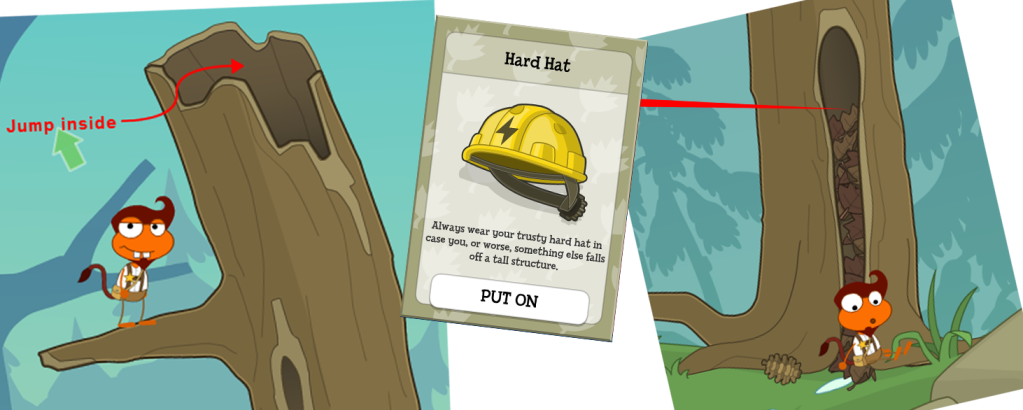
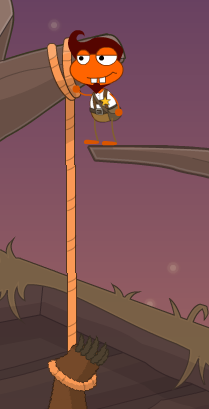
You’ll find a Hard Hat stuck inside a hollow tree trunk. To get it out, climb to the top of the tree, then slide down to grab it.
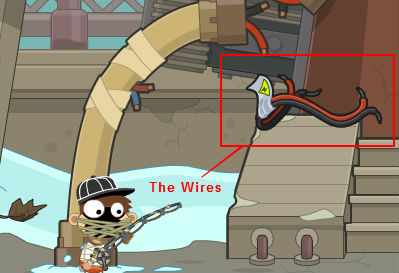
Next, run right and pick up the Wires. Then continue right to the next area.
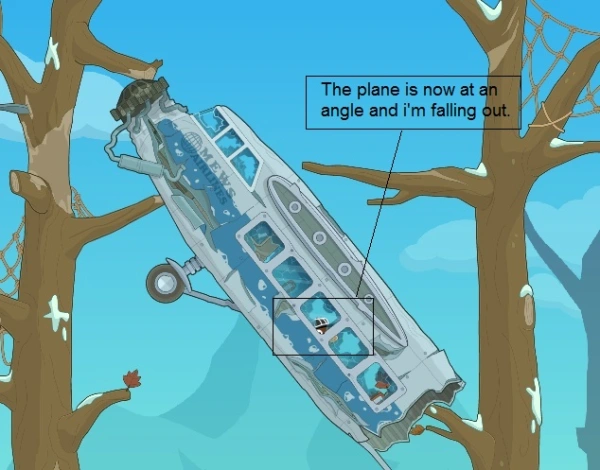
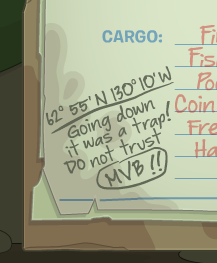
Now, climb the trees and venture inside the wrecked plane to obtain the clipboard of papers called the Manifest. Continue left inside the plane and click on the radio. The plane will shake and fall a bit, dropping you out. The plane is now at an angle so you can’t get back inside. For now, continue right.
Jump on the unattached right wing and fling it into the river as a bridge.
The next part is a bit tricky. Stand on the left side of the wing to tilt it up, then run full speed to the right and jump, trying to land on the right side. This may take a couple of tries. Once you make it, continue right to the next area.

Run right and climb the tree with the box of lemons attached, then go inside part of the plane that’s lodged between some tree branches. Inside, click on the box to obtain a Galvanized Nail.
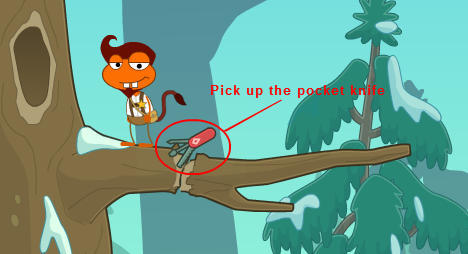
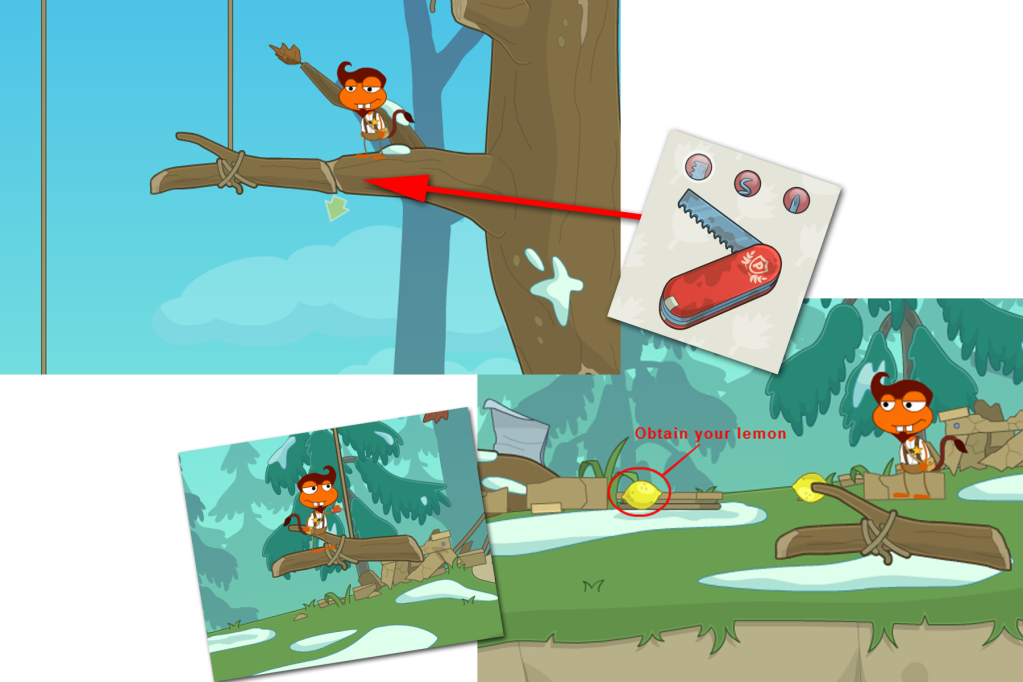
Jump down and land on a nearby branch, where you’ll find a Pocket Knife. Now go back to the tree with the box of lemons, and climb up to the branch with the rope attached. Use the cutting blade from the pocket knife to detach the branch. Now jump on the branch and push it all the way down to the ground.
Use the pocket knife’s cutting blade again to cut the rope attached to the branch, which will smash the box of lemons to the ground. Pick up a Lemon.
Run left and make your way back to the river. Stand beside the tree with the weakened trunk and use the cutting blade on it, making it fall into the river.

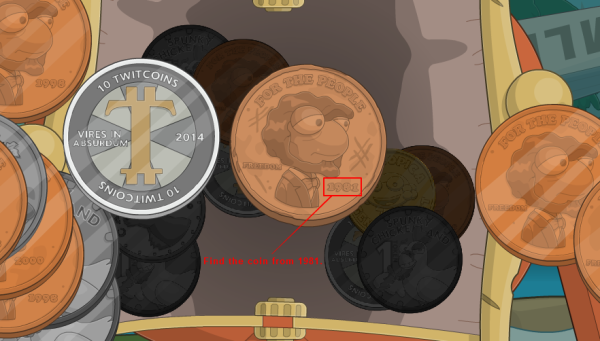
Click on the bag attached to the tree and sort through the coins inside until you find a Copper Penny from 1981. Then head left.
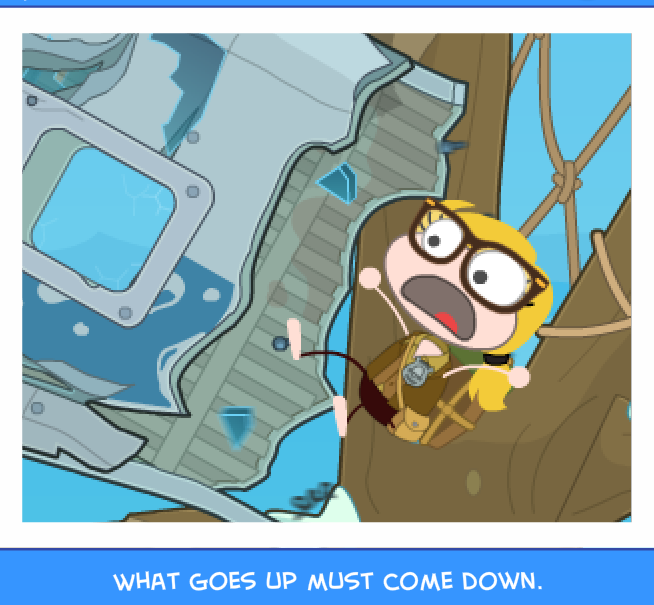
Return to the tree branch where the top part of the plane is stuck (the branch that’s just underneath the part that says ‘Mews Airlines’) and use the cutting blade. The plane will fall once more, and now you can go inside and grab the Radio. As soon as you do, the plane will fall further down, taking you with it. Climb up the chairs to get out. The plane will crash into the ravine below.
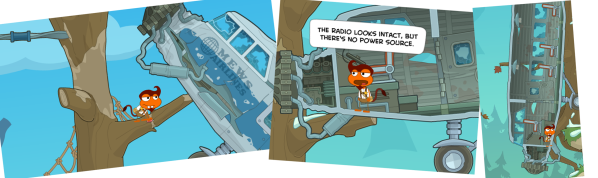
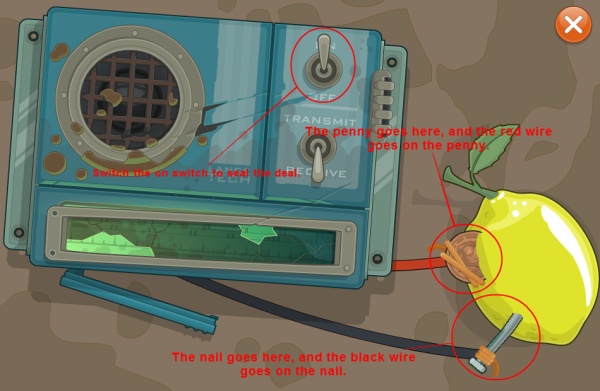
At this point, you have all the materials to you need to assemble your radio. Go into your inventory and “Assemble” the Radio. First, drag the penny and the nail into the lemon. Next, put the red wire on the penny, and finally, the black wire on the nail. Flip the switch on — and now the radio works!
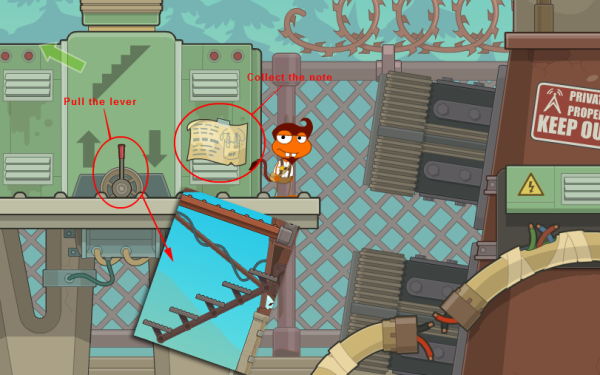
Head left and return to the radio tower. Take the Note attached to the center battery (located next to where you got the wires earlier), then click on the lever to lower the steps to the radio tower.
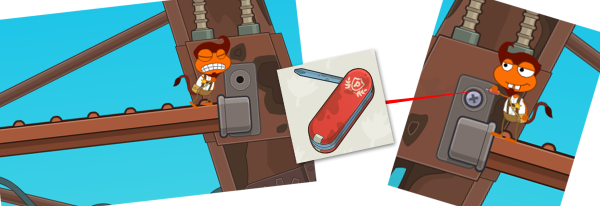
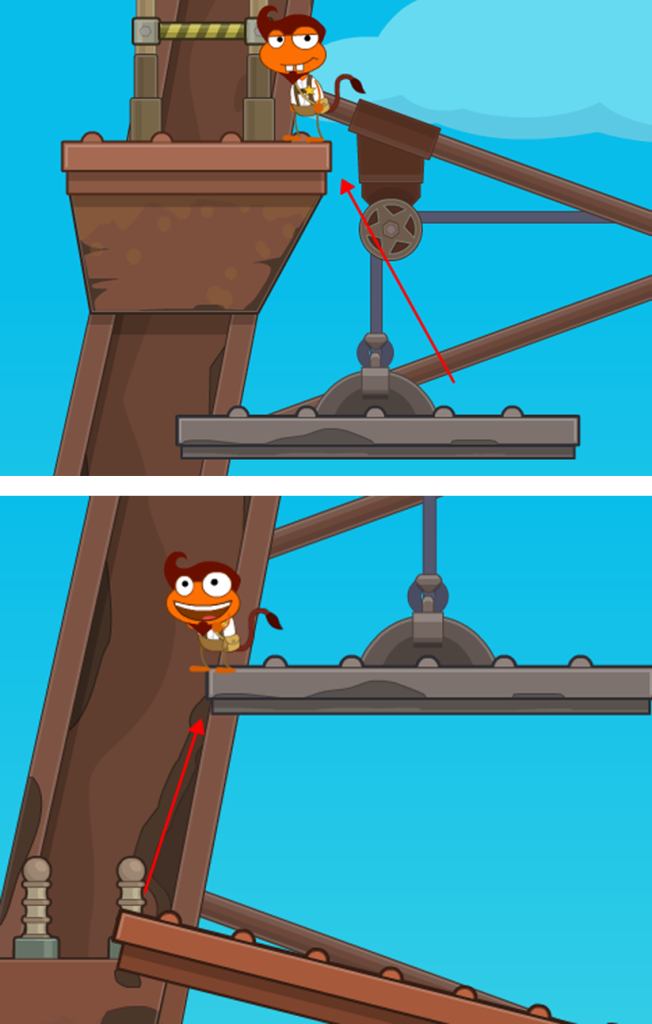
Climb up the steps, then detach the loose cap on the platform you’re standing on. Use the screwdriver head from your Pocket Knife to unscrew the cap on the left side and push it off.
You can then stand on the left side of the platform to make it lean upwards. Using the slope, quickly jump onto the pulley above, and then quickly jump to the next platform. If you wait too long while on the pulley, it will pull all the way down, and you’ll have to try again to reach the platform. Then, half of the next platform’s ladder falls off, so you’ll need to unscrew those caps as well.
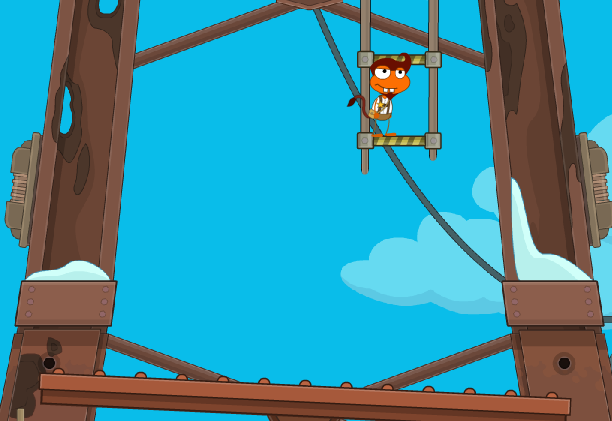
Just a bit more climbing after this! Continue up the ladder, then the satellite dishes, then another platform, then a rope and ladder, until you reach the top. Here, you’ll have all five bars on the connection signal in the lower left corner. Now, go to your inventory and click “Use” on your now-functioning radio…
A cutscene will follow, where a mysterious “Myron van Buren” receives your call for help and sends a helicopter over.
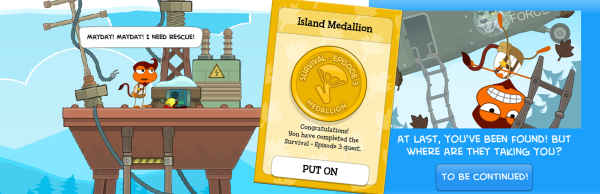
You’ll receive the Episode 3 Medallion. Congrats! You’ll climb on the helicopter… sent by Myron Van Buren… MVB?
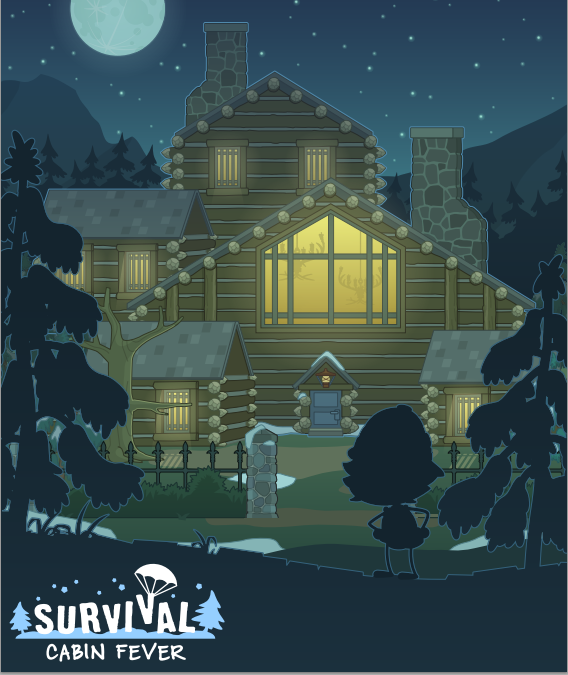
Episode 4: Cabin Fever
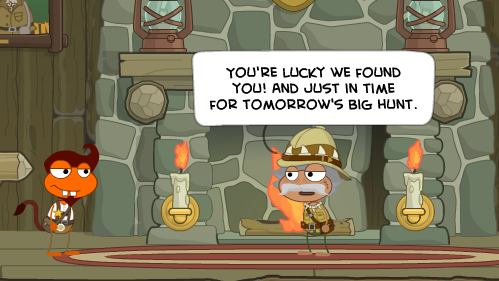
You and Myron Van Buren jump off the plane that picked you up in Episode 3. He then leads you inside his home.
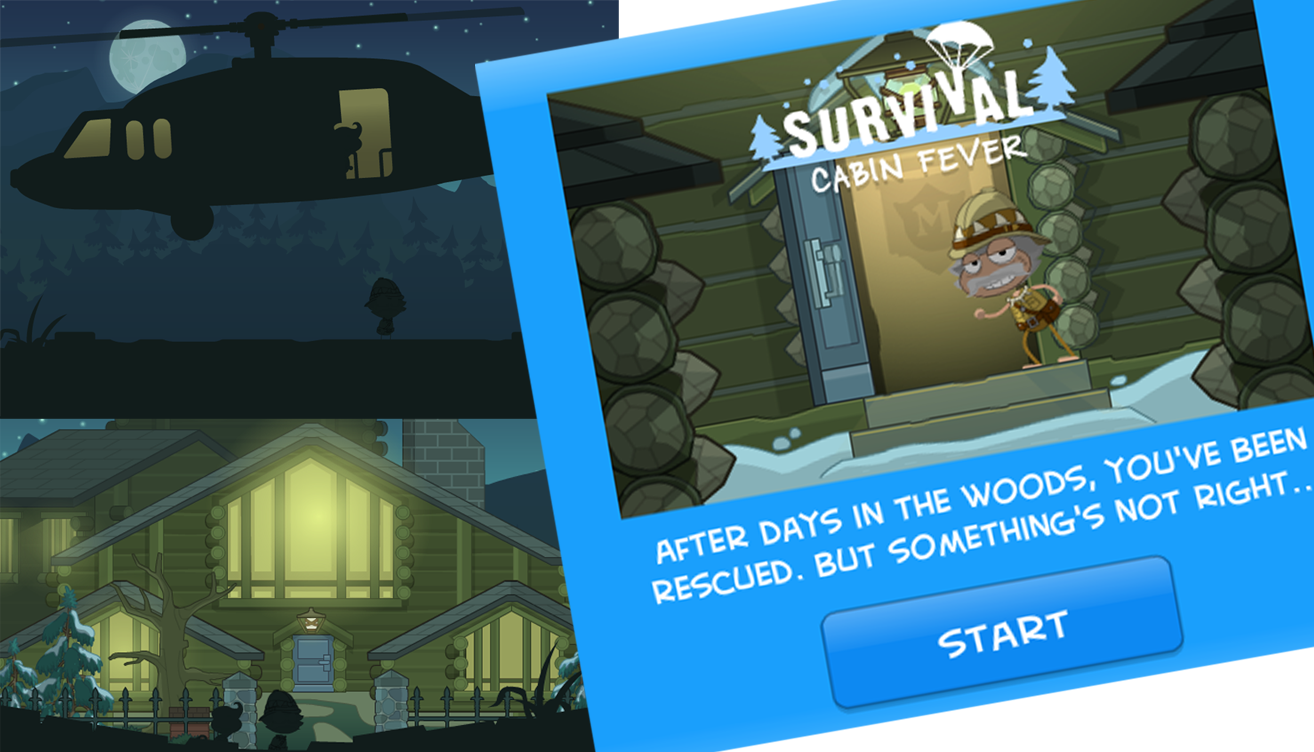
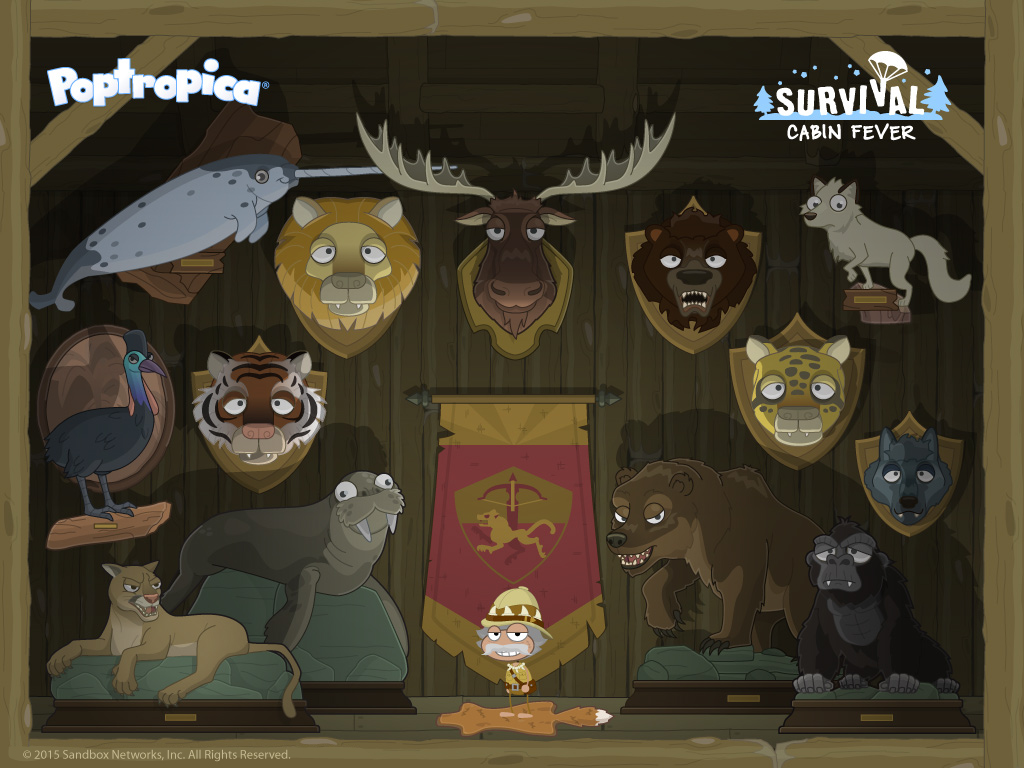
Once inside, Van Buren will explain that he is the biggest game hunter in the world. He insists on taking you on a hunt tomorrow, and tells you to meet him in the Trophy Room. Take the door on the bottom right to get there.
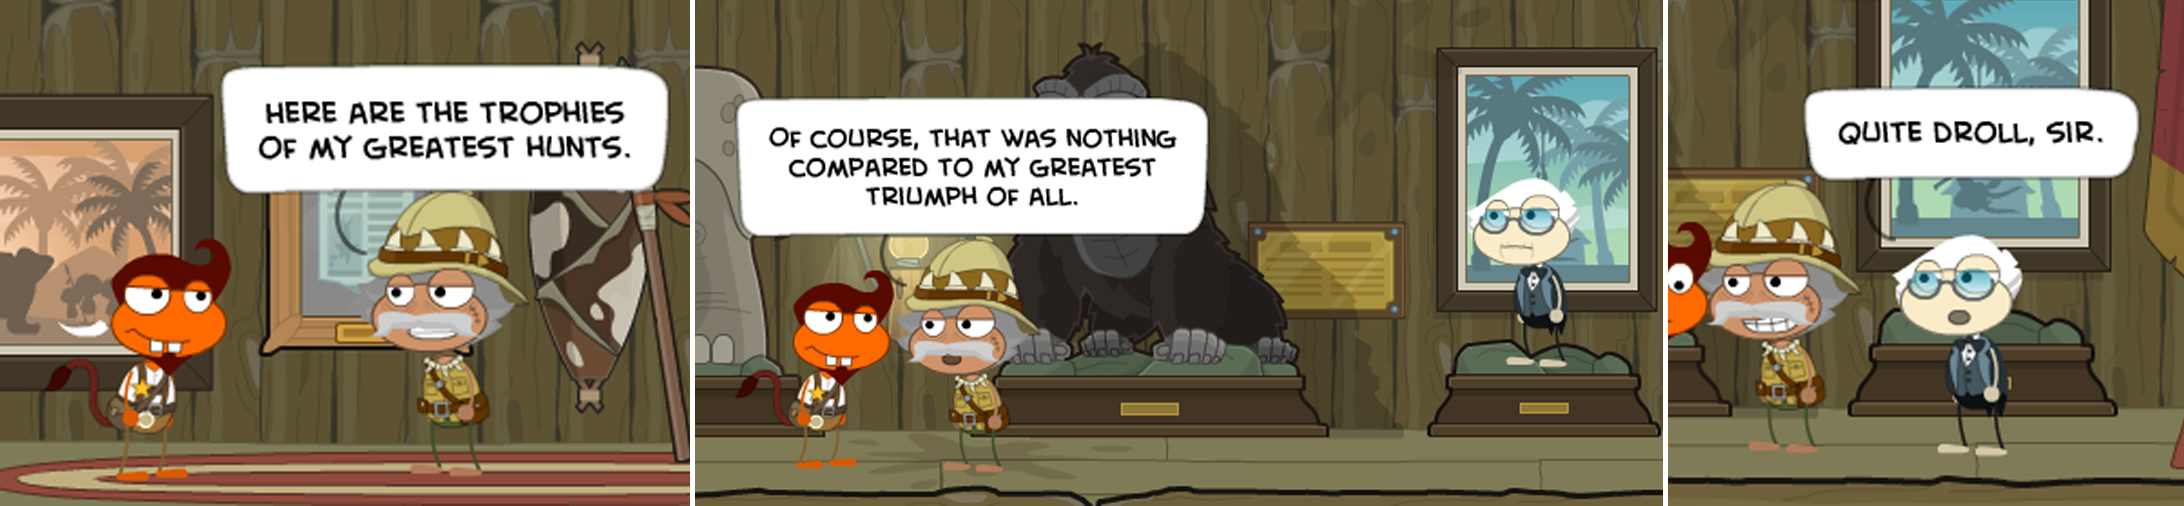
Talk to Van Buren and he’ll give you a tour, from animal displays to his assistant, Winston. After showing off the room, Winston will head out to tell the chef to get a meal ready. It’s dinnertime!
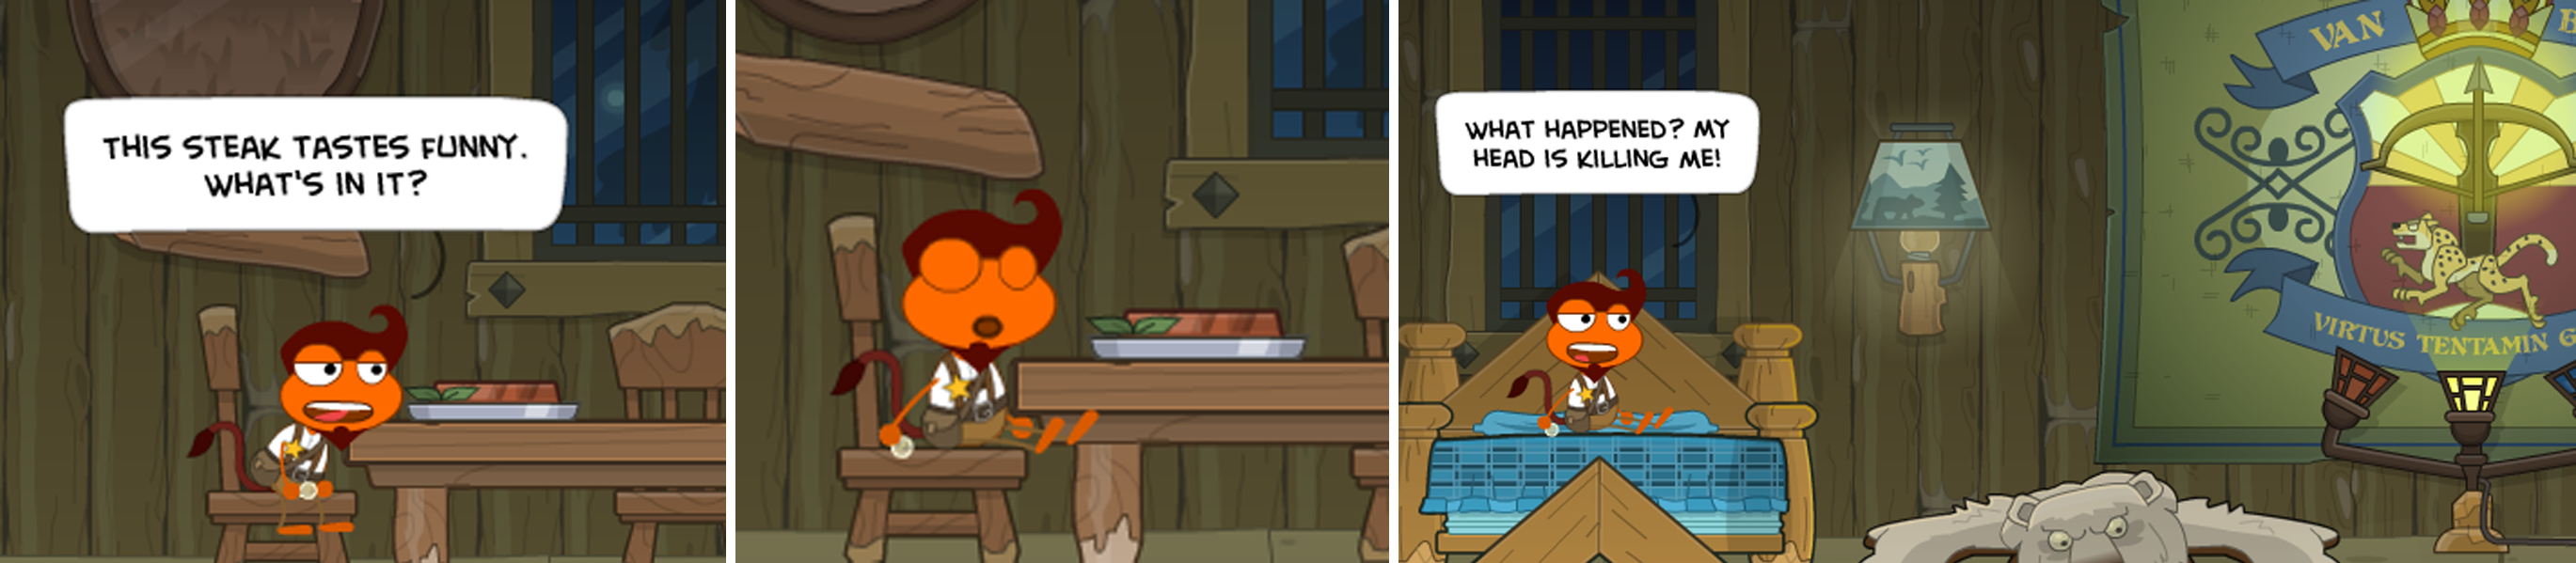
Once back in the Main Hall, continue to the Banquet Room on the lower left. You’ll be treated to steak, but it doesn’t taste quite right, and soon you pass out. You wake up in a bedroom just as Winston locks the door and leaves.
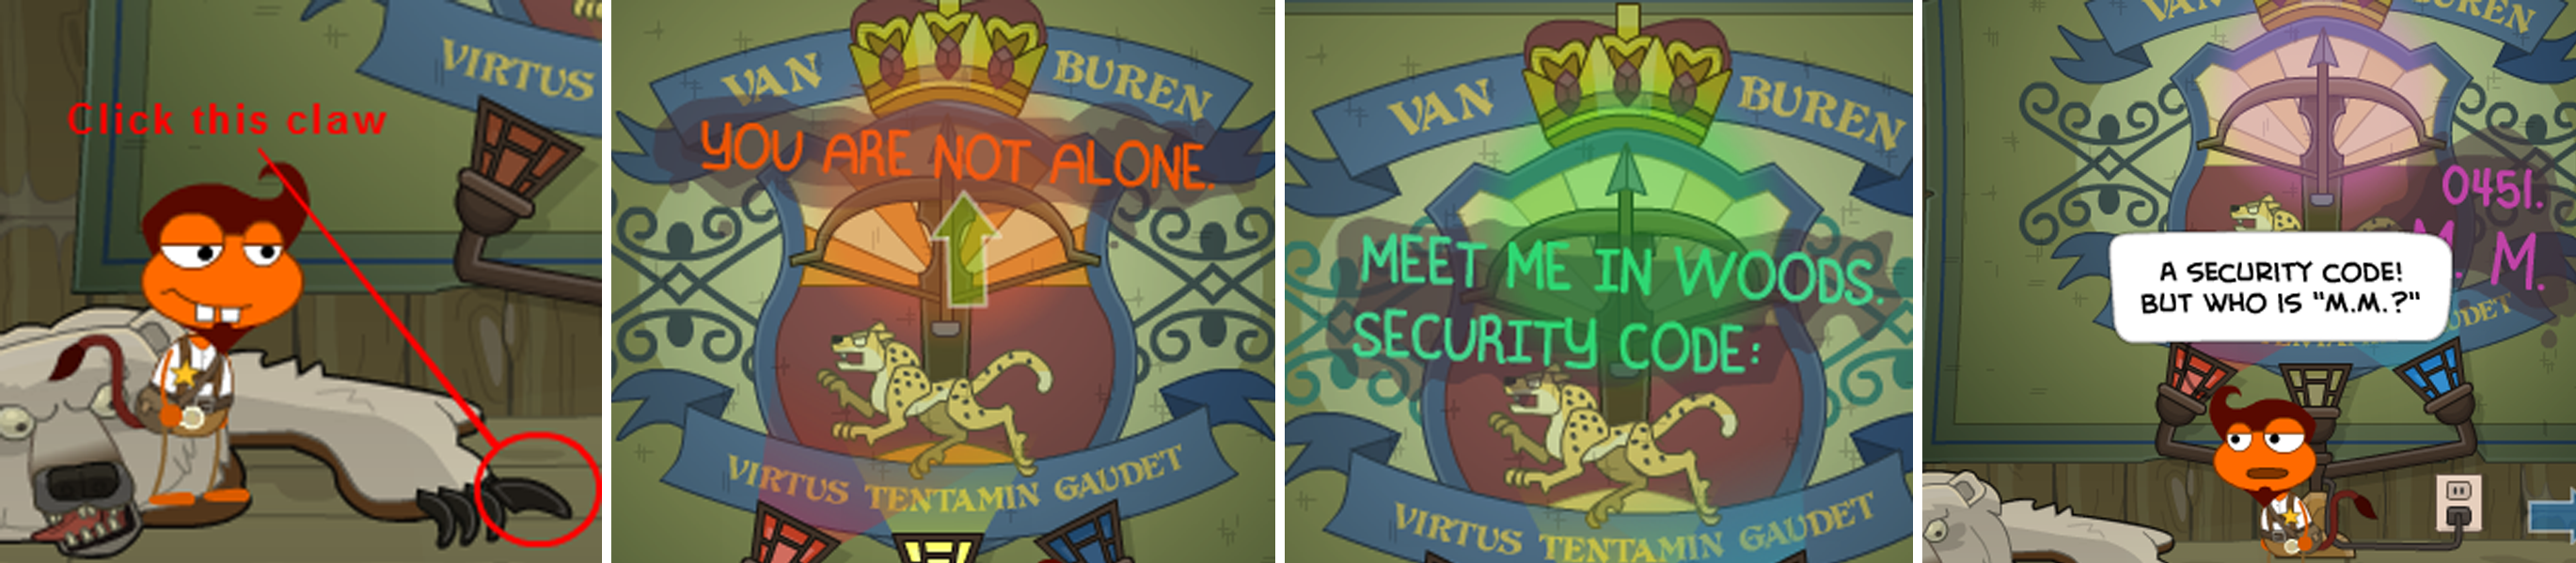
You’ve got to get out of here! Take the sparkling Bear Claw on the bear’s right hand. Then click the red lamp below the poster on the wall, revealing a secret message: “You are not alone.”
Next, click the red lamp again to turn it off, and click the blue lamp to reveal even more: “Meet me in the woods. Security code:”. Lastly, click the yellow lamp in the center to turn it off and click the red lamp once more to reveal the Security Code (0451), along with the mysterious initials M.M. (perhaps it’s Max McGullicutty, from the Manifest in Episode 3?)
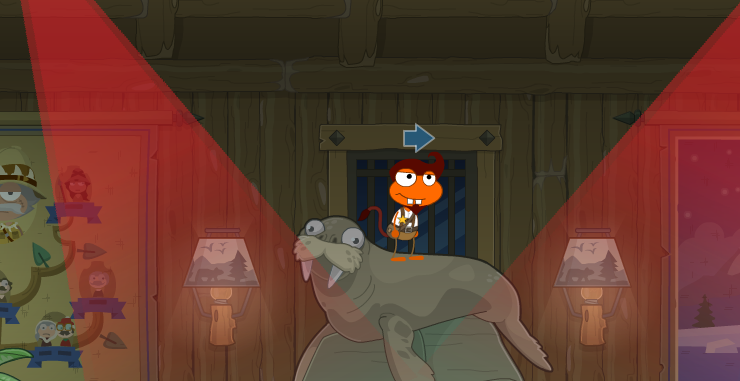
Now, use the bear claw and click on the locked door to pick it open. There are security cameras outside the door, so click the plants to hide behind them when the cameras are looking. After the first camera, jump onto the walrus and wait for the next camera to move away, then jump behind the second plant.
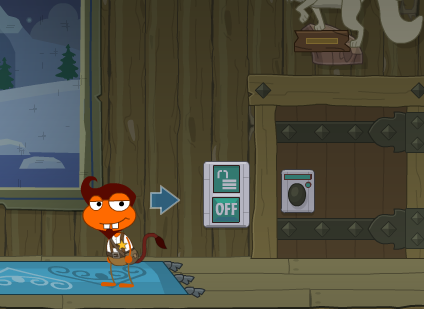
Once it passes, jump out and click the “On” button to turn the security off. Then, continue back into the Main Hall.
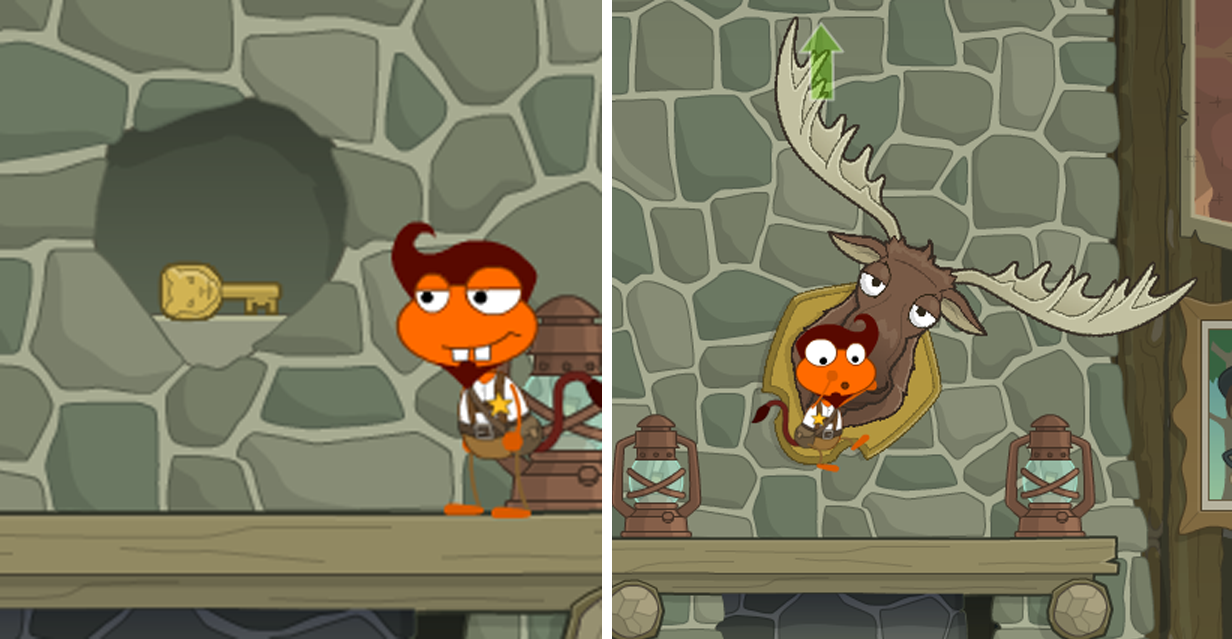
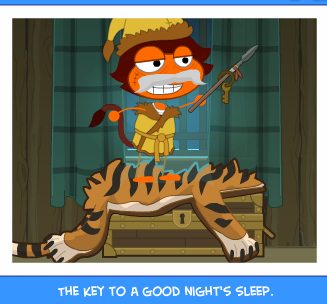
Make your way down the stairs and jump onto the mantel of the fireplace. Then jump onto the moose’s head, making it budge. Two more jumps and it will fall off, revealing a secret compartment with the Trophy Room Key inside.
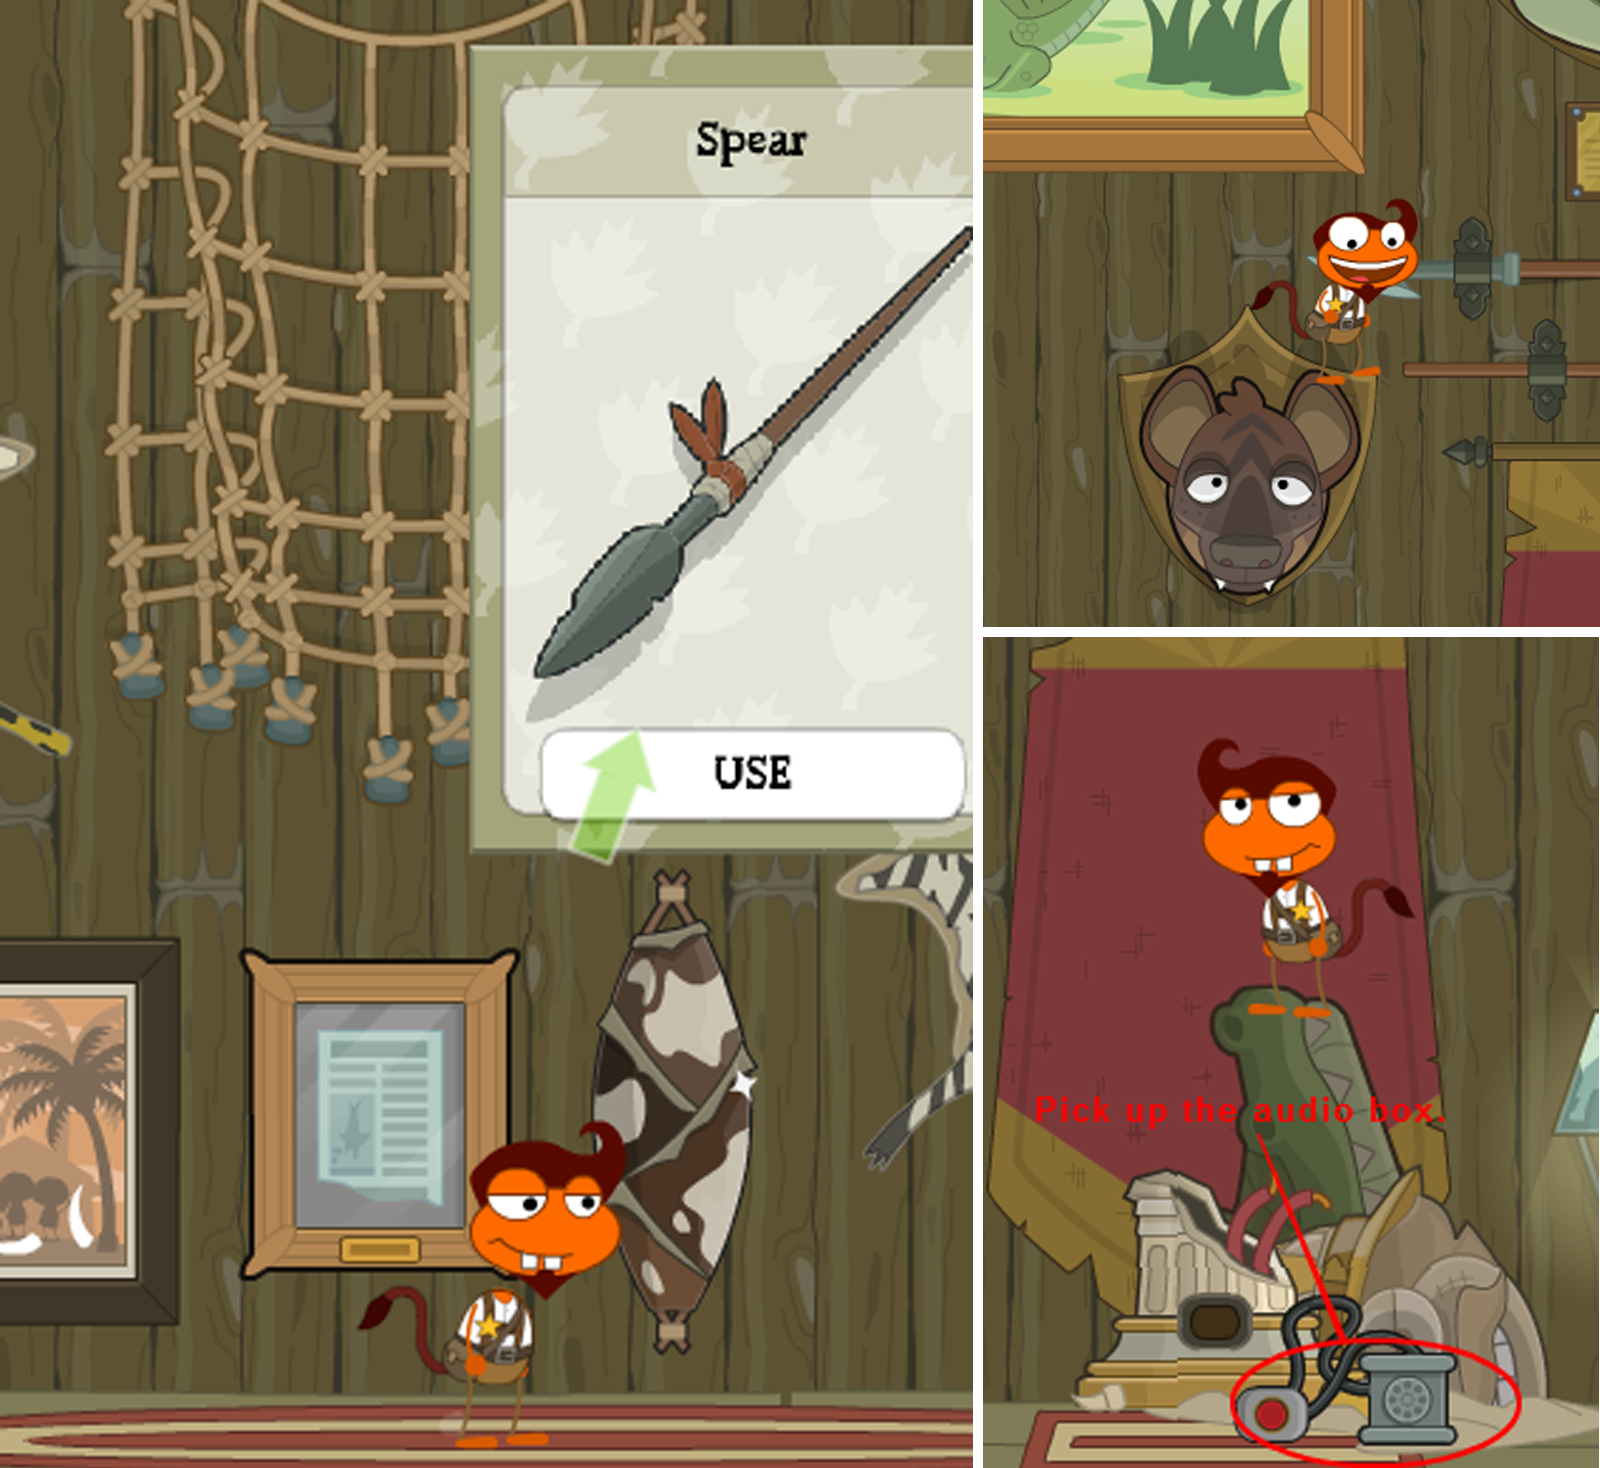
Now, use your new key to go inside the Trophy Room. Pick up the Spear next to the rhinoceros. Next, jump onto the rhino, and then the animal heads. The hyena head will break off. Jump onto Van Buren’s bust and then onto the bouncy elephant’s trunk. Land on the alligator head, which will fall and bust the bust (hehe). The remains will be a pedestal and an audio box containing a Voice Recording. Pick it up, then return to the Main Hall.
Now, go inside the Banquet Room. This time, you’ll need to stay clear of the sleeping chef on the left. If she catches you, she’ll send you back to your room.
Take the Empty Pitcher from the center of the table, then click on the sink faucet. The chef will wake up and slowly walk towards you, so quickly go into your inventory and use the pitcher, filling it up so you get a Full Pitcher. Then, jump into the plant next to the sink and wait for the chef to pass.
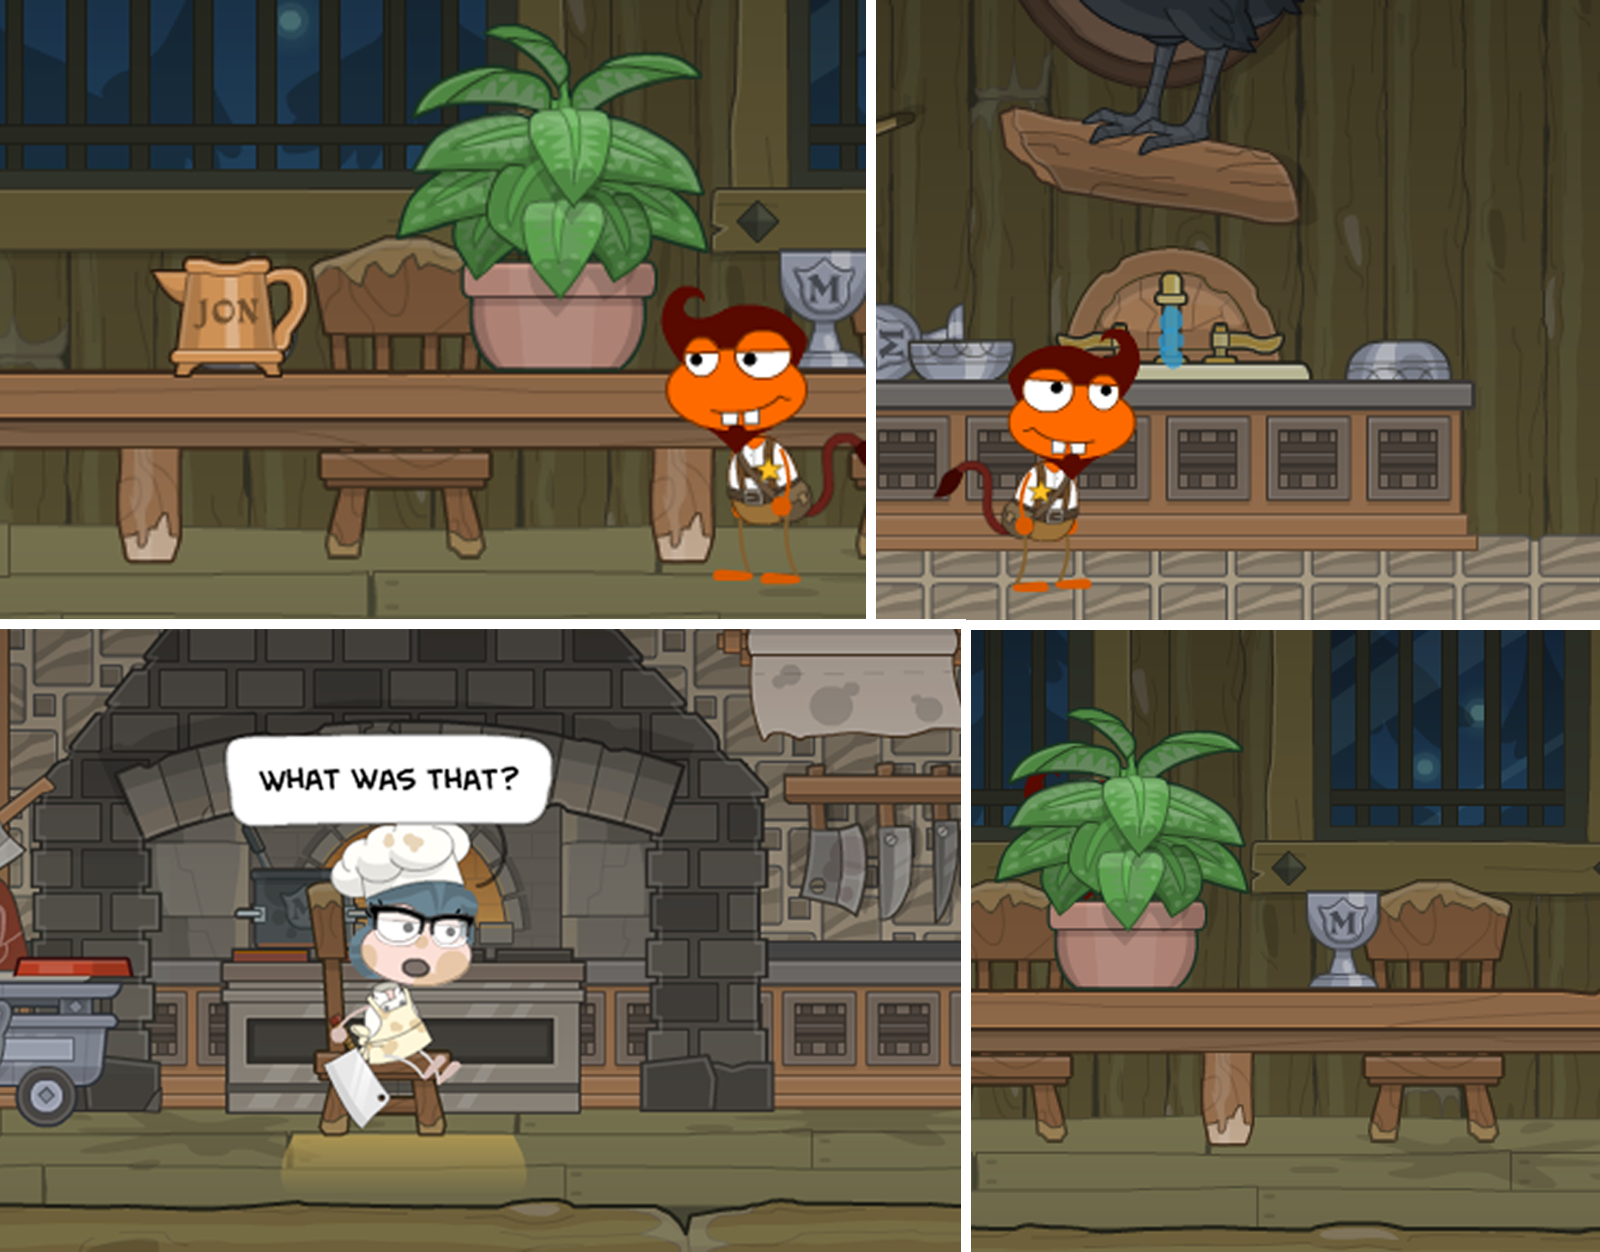
As soon as she passes, jump out of the plant and go to the left side of the room. Pick up the Tainted Meat from on top of the cutting board, then quickly jump into the nearest plant on the table and wait for her to pass once more. When she goes back to sleep, you can get out and exit the room.
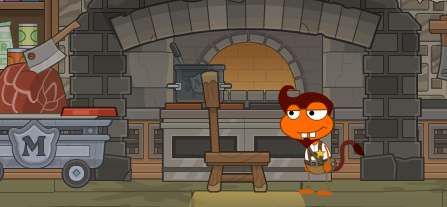
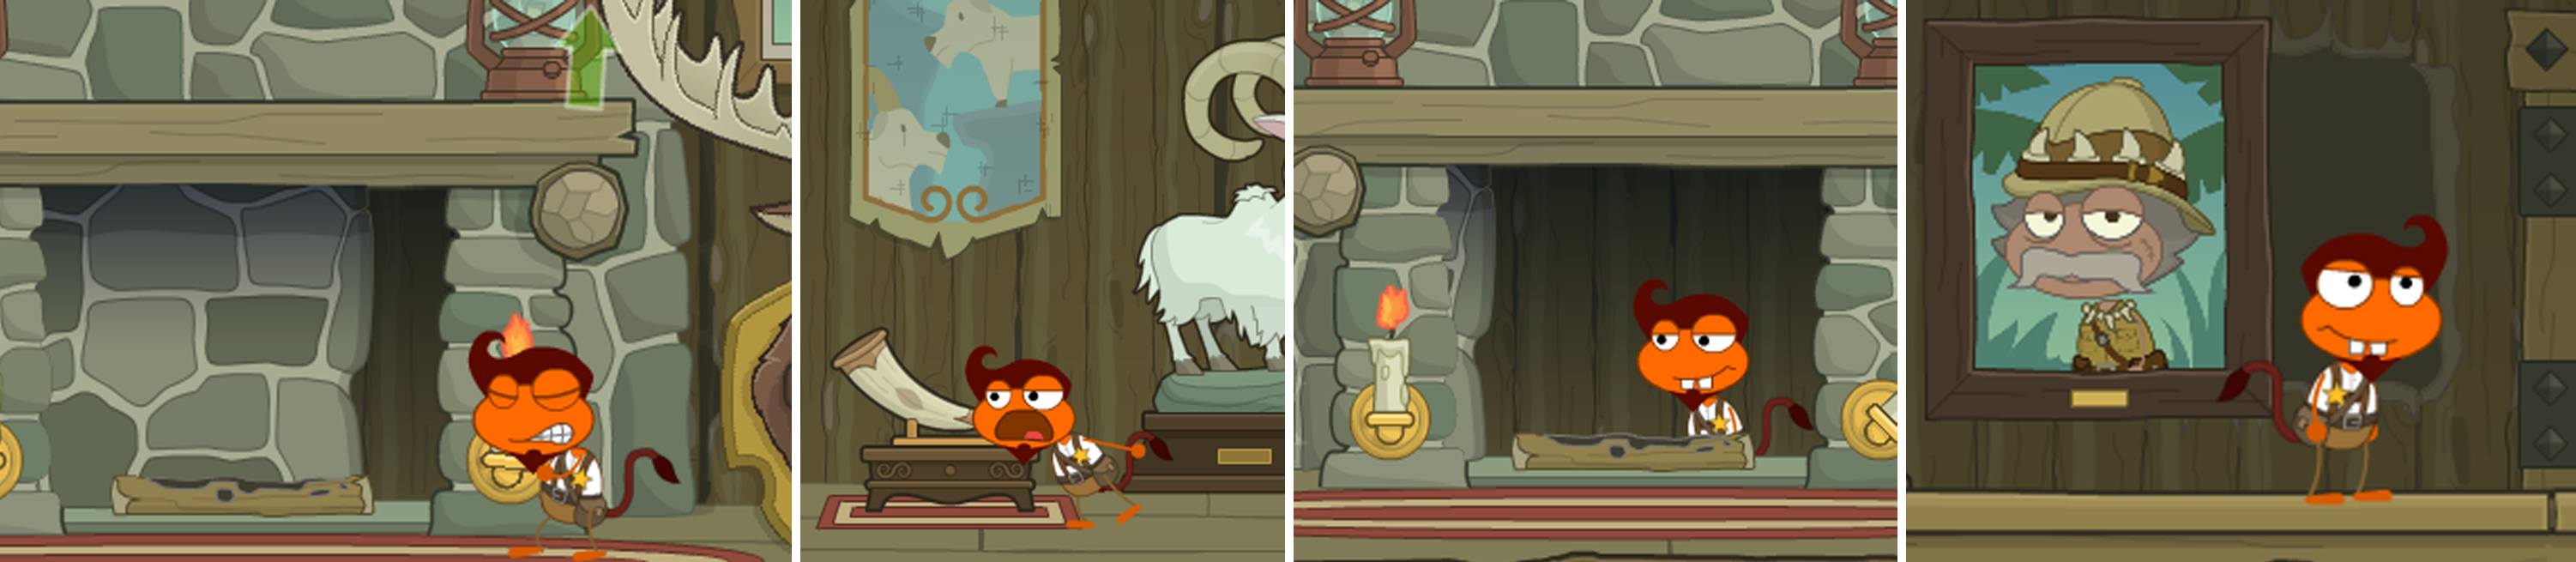
Return to the fireplace and use the full pitcher to put out the fire. Then, click the candle on the right side of the fireplace to pull it down, revealing a secret passage. You’ll need to get to the door of Van Buren’s room behind the walls without Winston noticing — which means you’ll need to distract him.
Click the horn next to the goat, making a sound and distracting Winston. Quickly run back over to the fireplace and click on the passageway to go inside. Climb the stairs and click the Van Buren portrait to open the exit of the passageway, allowing you into Van Buren’s room.
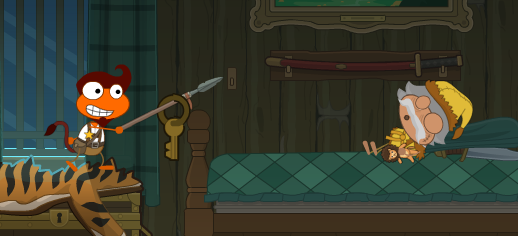
Open the door leading to Van Buren’s sleeping area. You can’t step on the bare floor or anything without padding, so jump on the animal heads to make your way through. Once you land on the tiger rug, use your spear to snatch the Armory Key from the hook on the bed.
Now, exit the way you came. Once you make it to the Main Hall, Winston is nowhere to be found. Return to the Trophy Room.
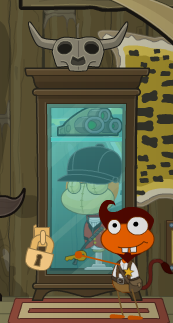
Use the Armory Key on the glass case near the right side of the room to open it, snatching the Night Vision Goggles (and if you like, you can Costumize the cool outfit too). Now, return to the Main Hall.
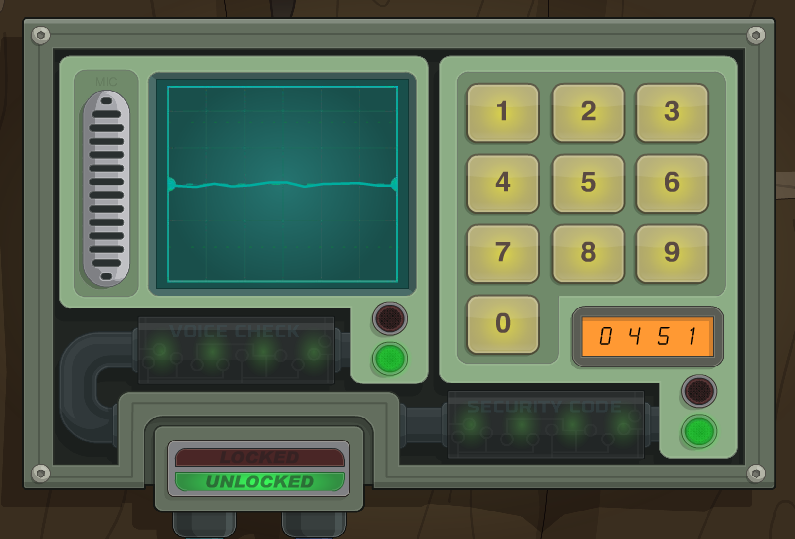
On the left side of the room, you’ll find the security door. First, use the Voice Recording to authorize the voice check (“tally ho!”). Then enter the code 0451, and the door will open. You can step outside!
Put on your night vision goggles so you can see. Avoiding the guard dog in the center, climb the tree next to you and stand on the branch right over the dog house. Use the tainted meat to throw it down. The dog will eat it and fall asleep, allowing you to get past. When you reach the exit, go left.
Congrats! You will win the Episode 4 Medallion.
But wait — right before you escape, Van Buren and Winston appear and walk toward you. Turns out the quarry for the hunt is you!
Episode 5: Escape!
Van Buren’s chasing after you. Your goal: survive!
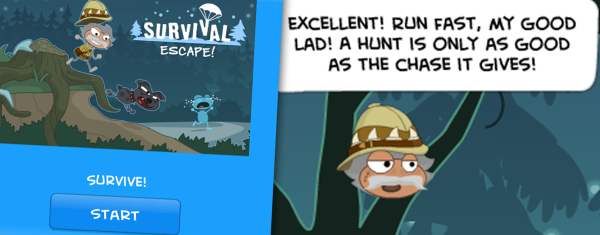
As you run, click in the upper half of your screen to jump over things like puddles and bushes, and click anywhere in the lower half to crouch under tree limbs. You can view your distance to Van Buren at the bottom of the screen.
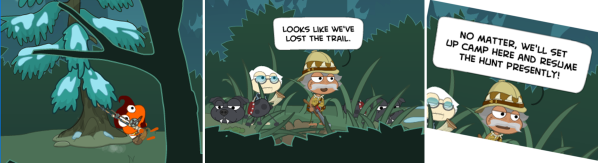
Once you get to the end of the path, you’ll fall into an unexpected hole masked by leaves. By the time Van Buren and his team catch up, you’re nowhere to be seen. They leave to set up camp.
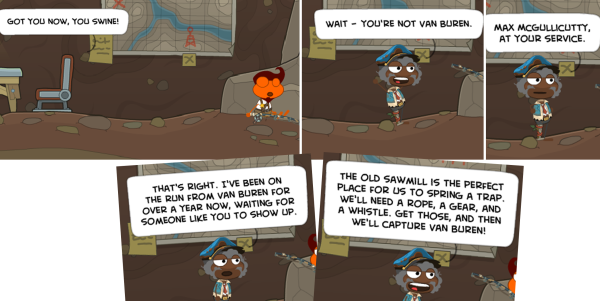
You’ll land in an underground room, unconscious. Someone says they finally have you… but it’s not Van Buren. Instead, it’s Max McGullicutty, who’s been leaving you hints throughout your journey! He wants to take Van Buren down once and for all. To do that, you’ll need to collect a rope, a gear, and a whistle.
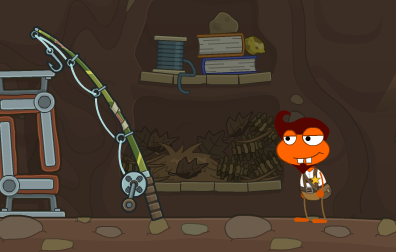
Before you head back outside, climb down into the room under the one you’re in, and pick up the Fishing Pole that’s leaning on some crates.
Back outside, you’ll notice that Van Buren is patrolling the left side, and one of his watch dogs is patrolling on the right. Avoid them and head into the next scene to the right, then go right again.
Climb out of the tunnel and jump over the trap onto the log. Jump into the water and swim across to the bouncy branches.
Jump up the bouncy branches, then veer left over the second trap. Once on solid ground, wait until the second watch dog is walking towards you. Then, jump into the slingshot contraption beside you to spring yourself over the dog. Continue right before the dog realizes that you got away, and jump over the third trap.
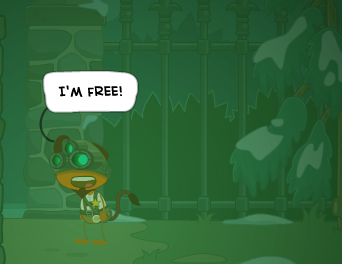
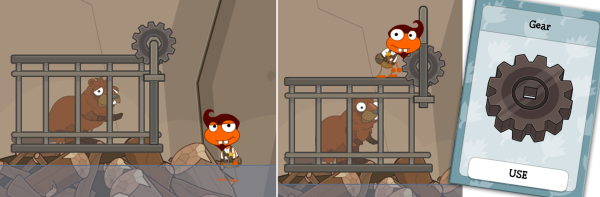
Next, jump down the waterfall. At the bottom, you’ll find a beaver (from Episode 2, remember?) trapped in a cage. Click the gear on the top to open the door and free the beaver. You’ll also pick up the Gear.
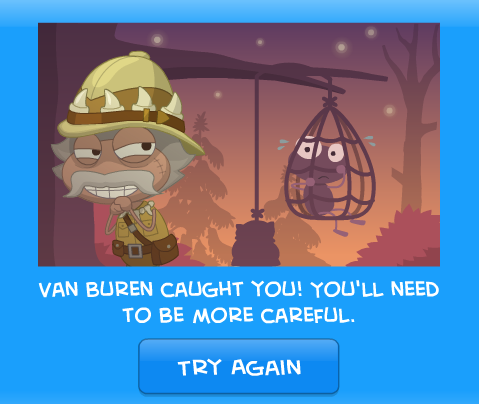
Return to the top of the waterfall. At this point, you can go ahead and allow the dog to notice you. You’ll get caught, but starting over will return you to the start of the scene while still letting you keep the gear.
Now, return to the base camp. You’ll need to keep track of Van Buren. Whenever he’s facing away from your exit, climb out and follow him, jumping over the pile of sticks to avoid being heard. When he stops, jump onto the branch above you, taking care not to disturb the woodpecker.
Continue up, and make your way to the other side (don’t disturb any woodpeckers!). Once you reach the farthest branch, scooch to the very edge and equip your fishing pole. Then press spacebar to let it down and snatch the gleaming Whistle hanging by the tent entrance. You can then jump off and get caught by the dog. Once again, it will return you to the opening of the hideout with the whistle still in your inventory.
Now, go back to the scene next to the base. You won’t be able to reach the hole in the tunnel to get outside, so click the rock next to the opening to flip it over, leaning it against the original rock. Then climb out to the left, as a watch dog is on the other side.
Next, climb up the rock platform with the waterfall pouring on it. Don’t climb too far though, as a trapped and angry bear awaits you at the end. Once you’re up a couple of levels, use the whistle. The dog will run over and stand for a while, puzzled. Quickly jump off onto the right side of the scene and push once on the rock on the right.
Then, jump back down into your hole. Repeat this until the rock is leaning on another rock. (Don’t worry if you get caught — the rock does not return to its original position when you start over.)
Climb to the next platform, and then the next. Push the next rock over a couple of times so you can get to the next platform. Once there, click the weakened tree trunk to push it over, creating a bridge over the trapped bear.
You can walk out onto a tree limb, letting you reach the end of the rope that is trapping the bear. Click the rope to untie it, letting the bear go back inside its home. Jump down in front of the cave entrance to pick up the Rope. Now, return to the base.
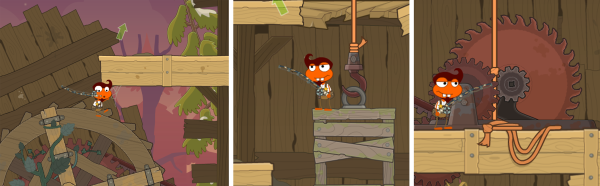
Go left past the base into the next scene: the sawmill. You’ll find yourself at the end of the tunnel. Wait for Van Buren to turn his back on the tunnel, then jump out and head inside the sawmill.
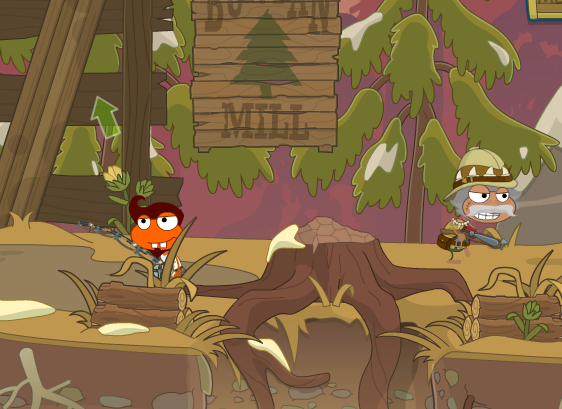
Use the gear, attaching it to the big red gear. Next, use the big water tread to get up to the second floor. Run down the stairs and push the crate down to the first floor. Finally, use the rope to attach it to the gear and set the trap.
Blow your whistle to get Van Buren’s attention. You’ll look over to where he usually stands guard, but he’s nowhere to be seen. When you look back, Van Buren is behind you! He traps you inside the crate that was intended for you, then explains why he likes to hunt humans — for the fun of it! He pulls back his arrow and gets ready to fire…
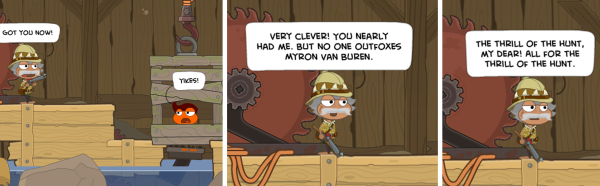
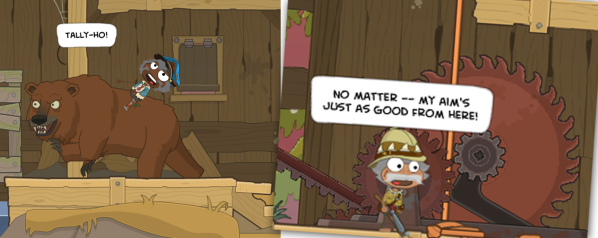
…until Max McGullicutty rides into the scene on the back of the bear that you freed earlier! The bear breaks the crate and you’re free — but Van Buren thinks that his shot is good enough. You’re not going to wait for that to happen, so you jump and push him onto the water tread. Two beavers decide to deliver some revenge too. Every time he goes underwater, he get slapped in the face twice!
You’ll win the Episode 5 Medallion. Congratulations, you’ve completed Survival Island! You’ll fly off in the sunset with your new friend Max, while Van Buren is left out in the wilderness, getting a taste of his own medicine.
Looking for more walkthroughs? Check out our Island Help page! 🏝
Album Photos
These pictures appeared in a former feature known as the photo album.

Trivia
- Survival Island is Poptropica’s 38th island. It is the first island to be released episodically, meaning that new chapters (episodes) were released over time. The first episode (Crash Landing) was released to members on March 20, 2014 and April 17, 2014 for everyone.
- Survival Island (full version) was re-released for Steam on May 25, 2022.
- Survival Island is the first island to have no common room.
- According to the official description, the island takes place in the Yukon, which is in Canada.
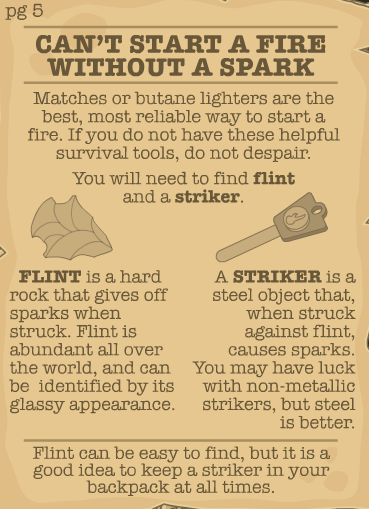
- One of the handbook pages is titled “Can’t start a fire without a spark” – a line in the Bruce Springsteen song “Dancing in the Dark”.
- The Wet Kindling you can pick up in Episode 1 is actually not needed and can’t be used, since what you need for your fire is the Dry Kindling in the bear cave.
- There’s a cutscene at the beginning of the island where your blimp crashes in the thunderstorm, which is the first time the blimp has played a role other than transporting you from island to island.
- At the start of Ep. 2, you climb down the cliff you could jump off of in Ep 1. The chunk of wood you can throw off the edge of the far left cliff in Episode 1 awaits you on the ground in the first area of Episode 2.
- In Episode 2, there is a tree carved with your Poptropican’s name, saying “(Your name) was here.”
- The crashed plane in Episode 3 is labeled “Mews Airlines”, a reference to the Mews Foundation, first seen on Cryptids Island.
- In Episode 3, when you search through the bag of coins, there’s a coin worth “10 Twitcoins”, a spoof of Bitcoin currency. This coin is dated 2014, the year Survival was released. The motto on the coin is “vires in absurdum” (Latin for ‘strength in the absurd’), also a spoof for the motto on Bitcoins, “vires in numeris” (‘strength in numbers’).
- US pennies stopped being made out of copper in 1982. This is reflected in Episode 3, when you need a copper penny made in 1981 to help you assemble a radio.
- The Pocket Knife you find on a tree branch in episode 3 is a Victorinox Swiss army knife. However, the logo has a “P” in it for Poptropica.
- In Episode 3, the detached plane wing by the river says “MLP4VR”, which may mean “My Little Pony forever”.
- Starting from Episode 4, the plot is loosely based on the 1924 short story The Most Dangerous Game by Richard Connell. In it, the big-game hunter General Zaroff intends to hunt humans who end up on his island, much like Myron Van Buren of Survival Island. The story is referenced in a newspaper clipping found on the wall of Van Buren’s trophy room, which says: “Myron Van Buren, the last descendent of the legendary Van Buren hunting family, continues his family’s quest to seek out ever more dangerous game.”
- The keycode in Episode 4, “0451,” is used in many video games such as Deus Ex, System Shock, and BioShock.
- Using the “tainted meat” to put the dog to sleep is inspired by The Secret of Monkey Island.
- “Cabin Fever” is the name of the 6th Diary of a Wimpy Kid book (by Poptropica Creator Jeff Kinney) as well as the title of the 4th episode of Survival Island.
- The pitcher from Episode 4 says “Jon” on it, a reference to Poptropica Creator Jonathan Pitcher.
- Myron Van Buren bears a striking resemblance to the hunter in the classic film Jumanji. As if the similarity in appearance weren’t enough, the angry Jumanji hunter’s name is Van Pelt!
- The Van Buren family crest displayed in the cabin says “virtus tentamin gaudet,” Latin for “strength rejoices in the challenge.”
- The sawmill in Episode 5 has a sign that reads “Bunyan Mill”, likely a reference to Paul Bunyan, a giant lumberjack of American folklore.
- Members got an additional Survival gear pack during the island’s release: Wind Power, Ghillie Suit, and Rhino Costume.
- In May 2021, seven years after the island originally released, Poptropica put out the Lost Cubs Mini Quest, a quick game which borrowed scenery and bear cubs modeled after Survival Island.
