
Synopsis
Set sail for adventure! Outwit cunning pirates and battle fierce sea monsters in the biggest Poptropica quest yet. Build your ship. Assemble your crew. Rule the sea!
For walkthroughs on Skullduggery Island, scroll down.
or June 17, 2010 (for all)
Common Room: The Broken Barrel
Preceded by: Mythology Island
Succeeded by: Steamworks Island
Resources on this page: Island Extras | Synopsis from Poptropica | Video Walkthrough | Written Walkthrough | Album Photos | Trivia
Island Extras: Map | Official Tour | Video Playlist | Book Info | Buy the Book: Skullduggery Island

Video Walkthrough
For a written walkthrough with pictures, scroll down on this page.
Written Walkthrough
Walkthrough written by Zey-shomi
Special thanks to: Slanted Fish, Super Thunder, Vicyorus, Nameless, PopBuddies, Pixel, & Invisible Ring
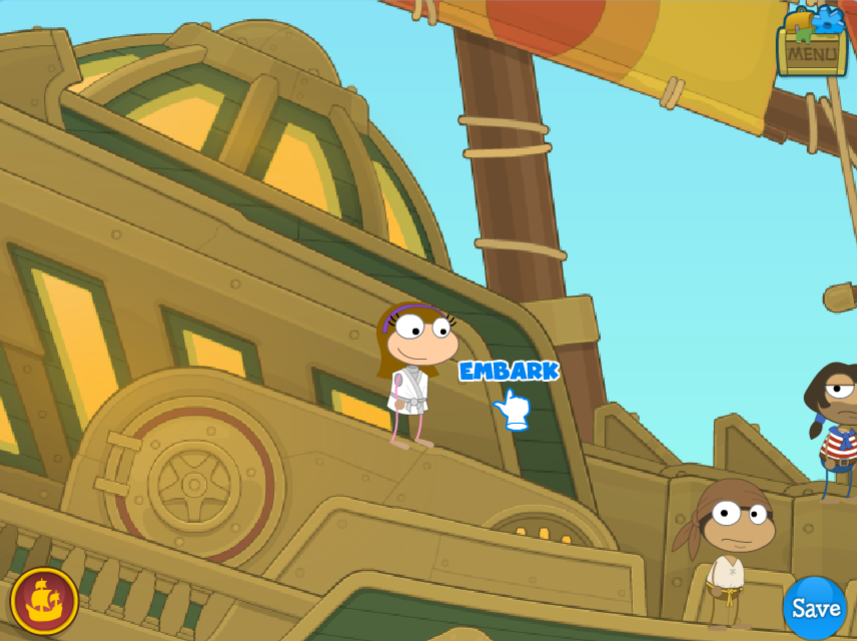
When you arrive on Skullduggery Island, you’ll see that the fort is all destroyed. Let’s go see what’s up!
Fort Ridley
Go right till you arrive at this small hill, then click to go right. Talk to the girl and she’ll say she wants someone to fetch her coin. Go under the hill and click go left. When you get there, pick up the Doubloon (a type of coin that pirates use).
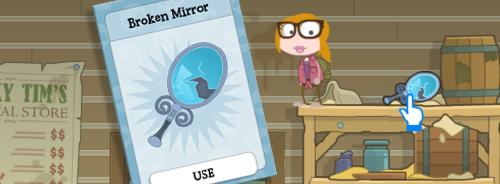
Go to the shop and press “Use” on the doubloon to get a Bag of Feed for chickens. Then head right until you see this shelf with a Broken Mirror on top. Click on it and she’ll say you can have it for free.
Exit, then go left until you see this guy with chickens. Press “Use” on the Feed and he’ll reward you with a Chicken.
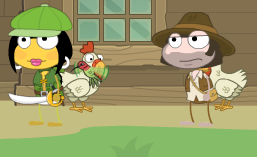
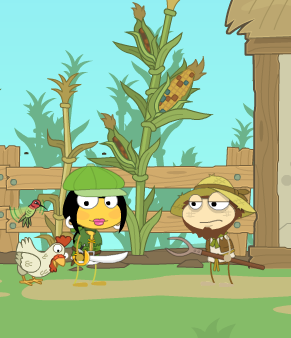
Then go right and up the hill and go even more right till you see a guy with bugs destroying his crops. Click “Use” on the Chicken and he’ll reward you with a Blue Candle.
Head further right till you see a bunch of rocks. Jump on the rocks till you reach the top and go right to find the mansion. Go inside the mansion and head right to talk to the governor. He’ll give you a message that has some part that will only be able to be read under the blue candle.

Click “Use” on the blue candle and he’ll show you the rest of the message.
Now, exit and go back to the first part of Fort Ridley. You’ll see a building with a soldier holding a musket. Climb up the building to find the telescope.

Press “Use” on the broken mirror and you’ll have to keep looking through the telescope until you see a small raft. (Hint – Scroll the telescope all the way left.)
Press the mirror icon in the bottom left corner when you see the raft and you’ll shine a signal. Then he’ll respond back and a message will say he’s approaching. He comes back and he gives you his raft.

There are only two other guys on it for now, but don’t worry, you can expand your crew later. Right now, though, let’s find the map pieces!
Bouffant Bay
To find the Map piece here, you talk to this one guy who says it’s on 312 Hanging Fern Way. Go right till you find hanging ferns. Remember… 3-1-2 is the order you need to hit.
- 3rd fern
- 1st fern
- 2nd fern

When you hit them in this order, a map piece will fall. Grab it. You will need to assemble the rest of your Skullduggery Archipelago Map by finding all the map pieces on various islands in this archipelago.
Parrot Port
To find this Map piece, you need to talk to the parrot. He’ll tell you to jump in the sea and then come find him.
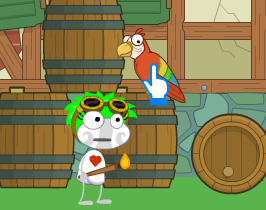
Jump in the ocean and then go on top of the second building (not including the tower). He will be on this window. Then he’ll tell you to clog the vent and see where he went. Go to the building to the right with the vent. Stand on it to clog it, and then go right and jump in the last palm tree where the bird is in.

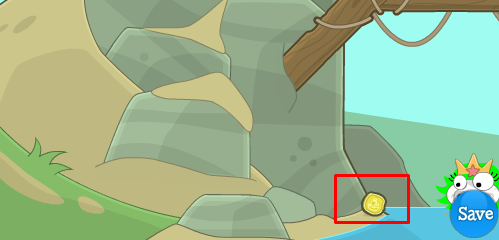
Then he’ll tell you to go to the tower, and you’ll find a friend. There will be a pirate and he’ll award you the map piece if you bring back the parrot. To find the parrot, you need a Cracker, which is in the top left corner of the pub (location indicated by the red outlined square in this picture):
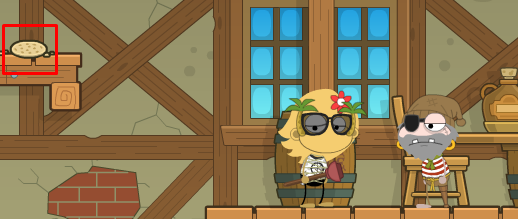
When you’re outside, press “Use” on the cracker and the parrot will fly to you. Then click on the pirate and he’ll give you the Map piece.
Golden Harbor
To get this Map piece, you need to light the lamps in a specific order: the first, second, and fourth.

Count the lamps and then do this. Light the fourth lamp first, which is right next to the gate. Then light up second lamp, which is on the first building. Next, light the first lamp, which is the first lamp you saw when you came.
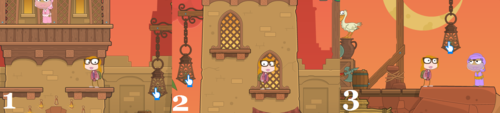
If you light them up in this order, the map piece will come out of the gate next to the fourth lamp.
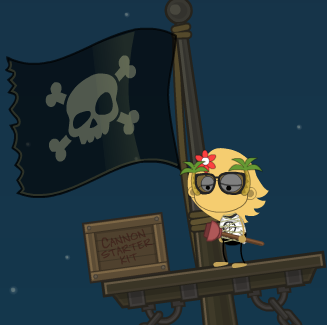
Pirate Outpost
To get this one, you need to go to the very top of the place. Jump on the post and pick up the Cannon Starter Kit at the top near the cannonry, just under the Jolly Roger flag.
You will also need to find an explosive barrel somewhere in the middle of the place. Push the explosive all the way down under the golden tooth of the skull. Click on the cannon a little left of the big skull.

When it hits the explosive, the gold tooth will fall out and then there will be a map piece sticking out.
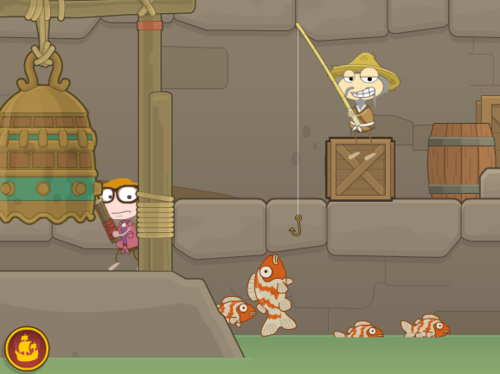
Dragon Cove
In the water, step on the first dragon head. You will get the Mallet.
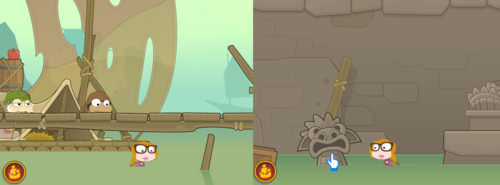
Bang the gong with the mallet. Then move the man with the fishing pole to where the fish jump. When he catches a fish, he will give you a map piece.
Ships
You can also upgrade your ship by visiting the merchant at “Ship Shape” in Dragon Cove. It’s recommended that you upgrade to the next best ship as soon as you have enough doubloons, because it will hold more cargo and move faster.
You will also receive a discount from the sticker price of the next ship depending on how strong your previous ship was. Once you buy a new ship, your previous one will be gone.
| Image | Ship Name | Price | Cargo |
 | Raft (default) | — | 20 |
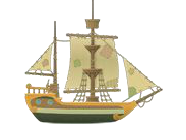
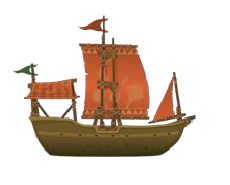
 | Jimmy Rigger | 3,000 | 60 |
 | Carabelle | 9,000 | 200 |
 | Sea Sultan | 30,000 | 600 |
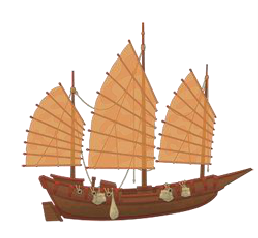 | The Koi | 90,000 | 1,800 |
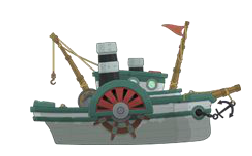 | Steaming Fury | 300,000 | 5,000 |
 | Phoenix Warbird | 1,000,000 | 6,000 |
Although people have reported being able to defeat Captain Crawfish without the Phoenix Warbird, it is still recommended that you get it because it will make your final battle with him much easier than if you were using a weaker ship.
Skullduggery Island
You will need to gather doubloons (1 million or a little less) to buy the Phoenix Warbird at Dragon Cove. Again, it’s recommended that you upgrade to the next best ship as soon as you have enough doubloons, because it will hold more cargo and move faster. Note that you will need patience, as it will take quite a while to gather all those doubloons.

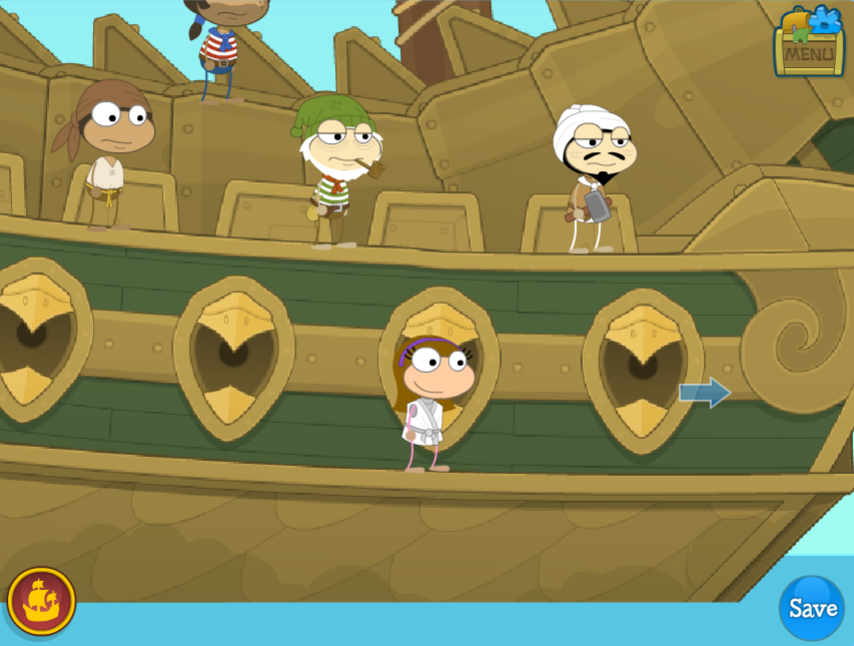
You will also need doubloons to assemble your crew. It’s best to buy all four crew mates (you can find people asking prices to be hired on every island except Golden Harbor) to beat the many enemies that will come. Here’s the list of all the crew mates:
- Cabin Boy (default)
- Cook (default)
- Cargo Master (found at Bouffant Bay) – gives extra cargo space depending on your current ship model; costs 15,000 doubloons
- Navigator (found at Parrot Port) – increases ship speed; costs 12,000 doubloons
- Cannoneer (found at Pirate Outpost) – loads cannons quicker; costs 20,000 doubloons
- Shipwright (found at Dragon Cove) – repairs ship without docking; costs 20,000 doubloons
The Cargo Master will be of use early on, but for the other crew members, it’s up to you whether you want to get them now or at the end.
Tips for Making Lots of Doubloons Easily
The best way to gain a lot of doubloons is to go from island to island in a clockwise direction, buying as much of the cheapest item as you can, then selling it all on the next island where it becomes most expensive and buying max of the cheapest again. Also, remember to collect salvages from the waters. If some other ship begins shooting at you, it’s best to run away rather than get beat.
Buying & Selling: What & Where
- Parrot Port – Buy: Grain, Sell: Medicine
- Pirate Outpost – Buy: Spice, Sell: Grain
- Dragon Cove – Buy: Silk, Sell: Spice
- Bouffant Bay – Buy: Medicine, Sell: Silk
Other Doubloon Tips
- Sell your salvages at the next island you dock at to clear more space for the suggested item you need to buy. Buy the max amount you can because you will profit at your next stop.
- Don’t stop to buy/sell anything at Golden Harbor; it’s not as profitable.
- When you go to the Pirate Outpost to sell the grain, steer your ship carefully and near Fort Ridley, in case you have to dock, because that area is filled with pirates. Try to avoid Skullduggery Island as well, since there are more dangers in that area, and only go there when it’s time.
- If you don’t mind risking your ship’s health, you can attack the sea monsters and other ships to earn extra doubloons and cargo when you defeat them. Otherwise, avoid them.
- You can get a loan at the Golden Harbor bank if you’re in a hurry for some doubloons, but keep in mind that you can’t take out any more loans until you’ve paid it back. Also, you won’t be allowed to buy a new ship if you don’t pay your loans, so be wise if you decide to take any out.
Battling the Boss
After you have assembled your crew and purchased the Phoenix Warbird from Dragon Cove, go to Skullduggery Island, which will show up when you have gotten all five map pieces.
Captain Crawfish’s ship will appear near Skullduggery Island. Keep trying to hit it with your cannons and don’t let him get out of your sight because he will keep healing.

If he only has a little health left and you have a lot, run your ship into his. It drains health from you and him very quickly, so only do this when he has a tiny bit of health and you have a lot. He will die quickly.
Once you defeat him, go back to the Governor in Fort Ridley and talk to him. He’ll give you a Map to the Treasure and a Bone Shovel.
Taking the Treasure
When you return to Skullduggery Island, walk six paces east (right) of the flag you see. Use your bone shovel to dig up the treasure, and Captain Crawfish will appear once again…

…but his ship falls apart because of your crew. When you leave, you’ll be awarded the Island Medallion plus credits to spend in the Poptropica Store. Congrats! You’re a true hero! You’ve rid Skullduggery Island of all forms of… er… skullduggery. 🏴☠️
Looking for more walkthroughs? Check out our Island Help page! 🏝
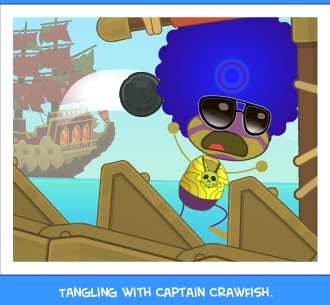
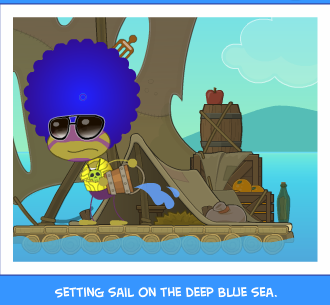
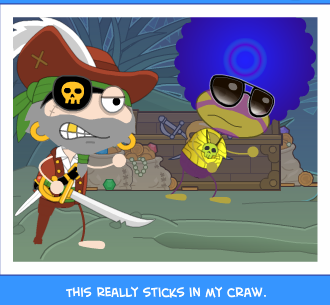
Album Photos
These pictures appeared in a former feature known as the photo album.
Trivia
- Skullduggery Island is Poptropica’s 13th island. It was released on May 20, 2010 for members and June 17, 2010 for non-members.
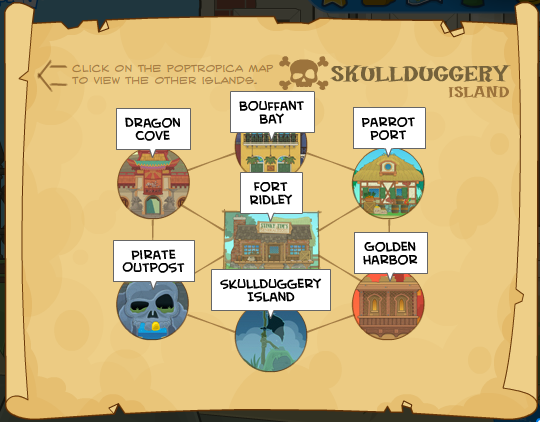
- Despite the name Skullduggery Island, it is really made up of several islands – Fort Ridley, Dragon Cove, Bouffant Bay, Parrot Port, Golden Harbor, Pirate Outpost, and then the actual Skullduggery Island at the end.
- The word “skullduggery” (sometimes spelled skulduggery) means “trickery” and may have been chosen because of the iconic skull-and-crossbones of a pirate ship’s Jolly Roger flag.
- Common room: The Broken Barrel
- There are many white clouds over the Skullduggery seas, and some of them have interesting shapes, such as a heart, skull-and-crossbones, smiley, fish, whale, bone, etc.
- Former PHB author Coderkid discovered from Poptropica’s code that this island would have originally been called Pirate Trade Island. A framework file in Poptropica that shows the islands’ code names does refer to Skullduggery as “Trade.”
- The ship’s names are, in order: raft, Jimmy Rigger, Carabelle, Sea Sultan, The Koi, Steaming Fury, Phoenix Warbird.
- Some people have reported being able to defeat Captain Crawfish without the Phoenix Warbird (although the Warbird is recommended). However, in the cutscene, your ship will display as the Warbird.
- Before the island was released, starting May 3, 2010, members received two exclusive items: The Skullduggery Teaser Trailer and a Skullduggery Pirate costume.
- An official book for Skullduggery Island was released on November 8, 2012. The first two chapters could previously be read for free on Funbrain. At the end of the preview, you’d get a promo code for the Skull Pirate costume (the code is SkullBook). The code no longer works.
