
Walkthrough and pictures taken by Slanted Fish
(note: I played this on an iPod touch; other versions may differ slightly)
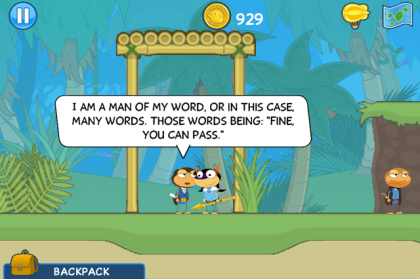
Poptropica: Forgotten Islands is available for iPad, iPhone, and iPod touch in the iTunes App Store for US$4.99, or Nintendo 3DS for around $30 from Amazon or your local video game store if they stock it. In this game, you’ll meet new characters, explore the forgotten islands, and discover Poptropica’s past, one ancient artifact at a time. Let’s dive in!

To start off, decide if you’d like to play as a boy or girl. Then you can customize your character a little and pick a randomly-generated name, although options will be limited. Mine’s called Angry Bird. Heh.
Tow Islands
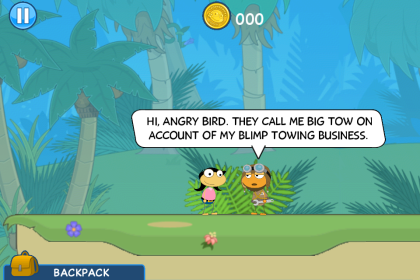
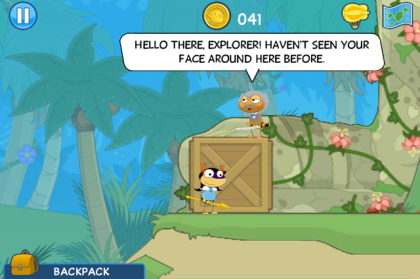
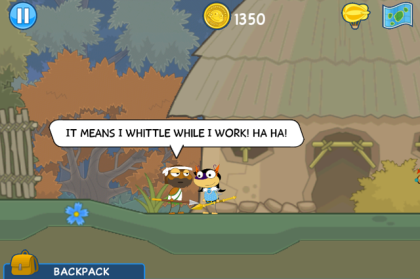
You’ll begin your adventures on Tow Island, where your character says a blimp was seen crashed nearby. Tap and hold to move where you want to go, and head right until you see a guy in aviation gear. (Tip: Any time someone has a scroll above their head, it means they’ll have a quest for you!) He’ll introduce himself as Big Tow. (Get it? Like big toe? How clever.)
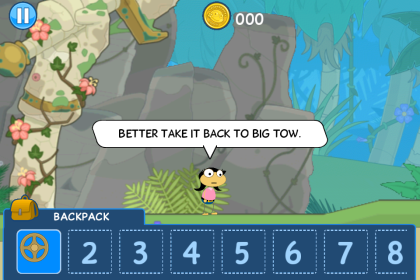
Big Tow wants you to find a valve. Continue walking right until you come across the valve, which you can tap to add to your backpack. Return to Big Tow and give him the valve. You’ll unlock the Map icon in the upper-right corner which you can use to go exploring with your blimp!
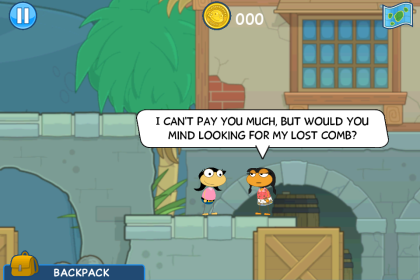
Big Tow wants you to meet him at the southwestern island, so tap the Map and steer your blimp to the island with the yellow scroll. He’ll say that his siblings may have jobs for you, so you should go look around. Keep going right and you’ll see a girl who introduces herself as Little Tow. She wants you to look for her lost high-tech comb.
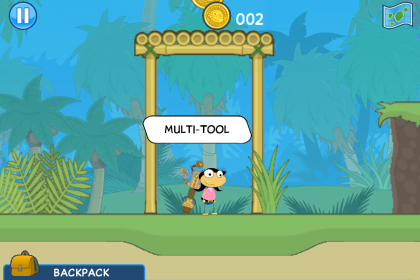
Go right until you see a Multi-Tool under a bamboo doorway and pick it up. You may also have noticed along the way that there are floating golden coins you can collect! These can be used later to accessorize your character, so start saving. Anyway, head back to Little Tow and return the Multi-Tool (which isn’t actually a comb). You’ll complete your first quest and earn 50 coins!
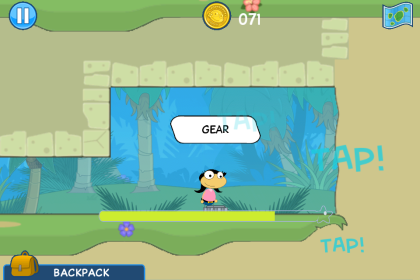
Now you should go find Bro Tow, who’s milling about on a house just to the right. He wants you to find and create a pair of gears. Keep going right and you’ll pick up a Gear, Wrench, and another Gear. Tap the screen repeatedly to put the gears together, then return to Bro Tow. You’ll earn another 50 coins for another quest completed.
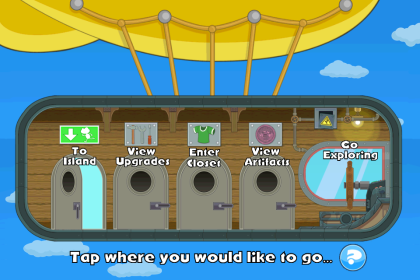
Now go back to Big Tow. He’ll tell you about a cave in the northeast island with some scary monsters that an adventurer like you might want to check out. You’ll also unlock the blimp icon in the upper-right corner, where you can spend your coins in the Closet to dress up your character and view the Blimp Upgrades and Artifacts you’ve earned so far.
Go exploring (via blimp) and land on the island with the purple scroll. Walk right until you pick up a Metal Piece and Temperature Gauge, then head back left and turn these items in to Bro Tow, who will give you 100 coins in exchange.

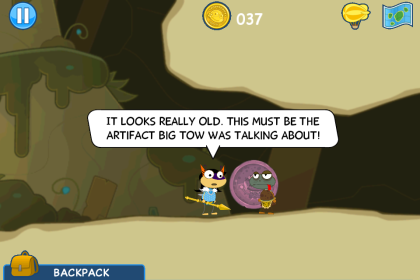
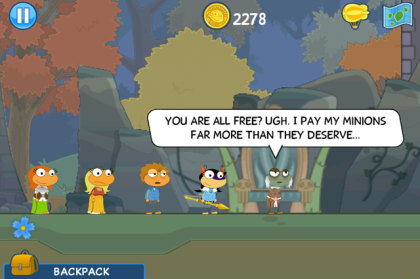
Go back to the original Tow Island and you’ll find Big Tow next to an underground cave. Hop inside and try to take the Artifact. A monster known as one of the Mabaya will snatch it away from you.
Talk to Big Tow again, and now you’ll be able to leave the Tow Islands and go explore the rest of the world!
Giant Islands
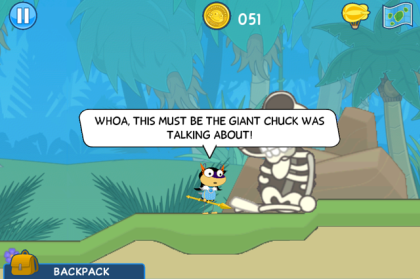
Go exploring, and this time, go over the border at the top and leave the Tow Islands region. Head south to a region called the Giant Islands. Land on the labeled Giant Island marked with a yellow scroll. Go right and you’ll find Chuck, the leader of the archeological crew camped on the island.
Run all the way to the right, careful to avoid the stinging mushrooms along the way, until you reach a giant skeleton. Go back to Chuck and tell him he’s got nothing to worry about.
Now he wants you to go find some monster bones. Go right again and pick up the various Dinosaur Bones lying around (there are 5; the last one is a giant skull).
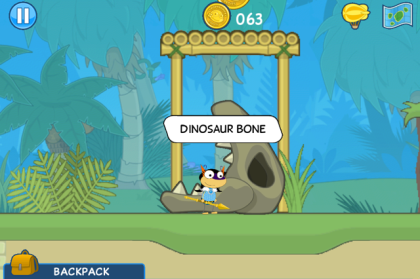
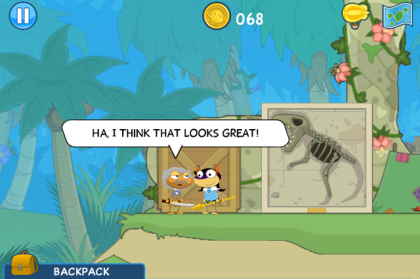
Run back to camp and hand the bones to Chuck. Now tap repeatedly to put the skeleton together, and you’ll earn 200 coins along with Artifact 1: The Mabaya Emerge, plus a blimp upgrade that blasts rocks out of your way!
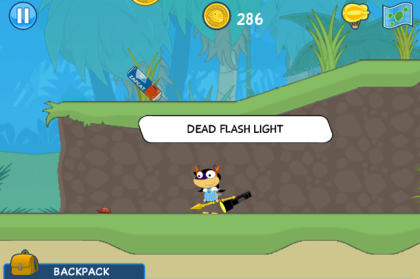
Go exploring again, and you’ll find an island with a purple scroll to the south. You’ll eventually meet a girl who says she’s low on supplies and asks you to fetch her a flashlight and sleeping bag. Go back left and pick up the Dead Flashlight and Battery to create a Flashlight.
Further left, you’ll find a Sleeping Bag. Now go back to the girl and she’ll reward you with 100 coins.
Mystic Islands
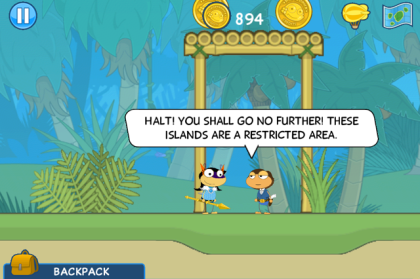
Leave the island group and enter the Mystic Islands region to the north, landing on the labeled Mystic Island with a yellow scroll. Walk right and you’ll meet Taylor, the leader of the Trinity Syndicate, who won’t let you through until you have the approval of his three lieutenants, who are standing to his right. Talk to them and they’ll tell you to fetch them a mountain peak, pyramid peak, and pointed roof. What odd requests!
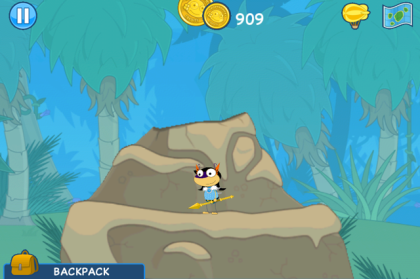
Head right to the brown structure and climb to the top. You’re just beginning to wonder how you’re supposed to take the peak when suddenly it turns out you just do it. Who knew you were this strong?
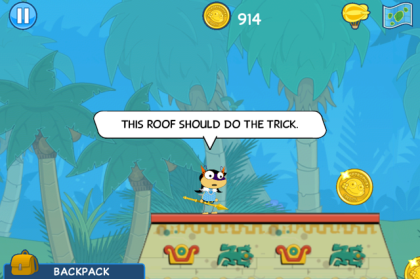
Continue right until you reach an Aztec-style structure, and climb to the top. Again, you’ll just grab the roof like it’s no biggie. How you even accomplish such a task is beyond me.
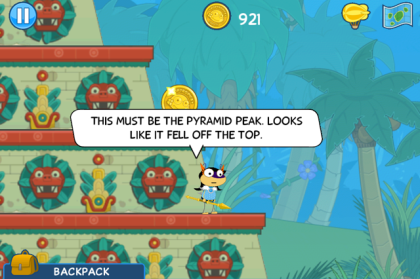
Continue further right and you’ll encounter another Aztec structure, this one with creepy red faces on them. To the side of one of the decks, you’ll find a piece that fell from the top, which turns out to be the pyramid peak.
That’s all of them! Run all the way back to the three lieutenants and return them the strange items they desired. Talk to Taylor again, and he’ll grant you access to the northern island.
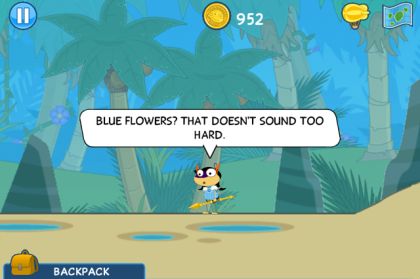
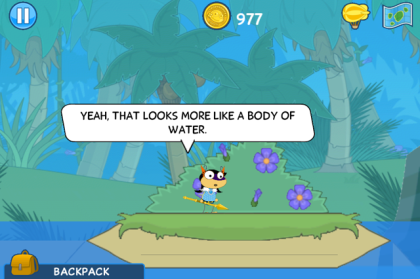
Head over there on your blimp now. Go right, past the syndicate guard and puddles of water, until you come across the dirt that tells you to “find a body of water.” Go back to the pitiful puddles of water and now you’ll be told to find blue flowers.
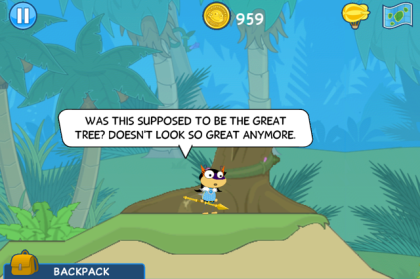
Head right until you see them, and now there will be a clue telling you to find the Great Tree.
Go right, and you’ll soon realize the tree isn’t so great after all.
Talk to the guy about the clues, and he’ll tell you that they’re actually for an island that split and drifted south of the one you’re on. Get on your blimp and travel to the island with the yellow scroll. Keep going right, past the tribal guard and rundown huts, and you’ll find a more impressive body of water than the one from the last island.
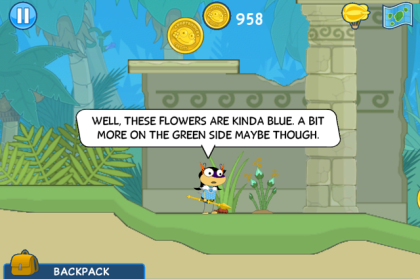
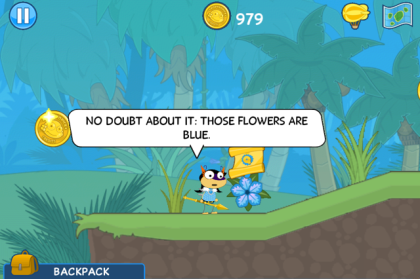
A little further right, you’ll find some definitely-blue flowers.
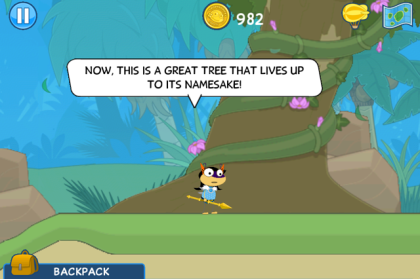
Further still is the aforementioned Great Tree, and with it another clue: “Do what mother says.”
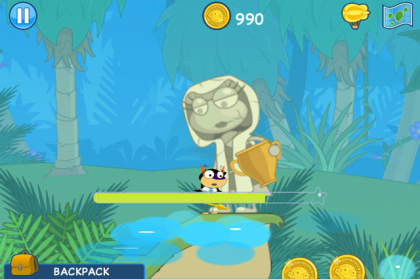
Keep going right, and you’ll reach a statue of a lady staring at the ground. It’s time to start digging – just keep swiping back and forth and you’ll uncover Artifact 2: Territorial Disputes (plus 200 coins and a blimp upgrade that conquers mighty winds)!
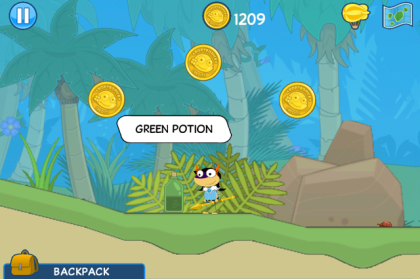
There’s still another island in this region, marked by a purple scroll. Go right and you’ll meet the island’s witch doctor, who needs you to find him a green potion. Above the witch doctor, you’ll find a Blue Potion. Go right and take the Yellow Potion as well, and these two colors will generate the Green Potion. Talk to the witch doctor, and he’ll want you to take it to his friend.
Go right and you’ll find a man with a purple scroll above him. Talk to him and keep swiping to shake the potion. He doesn’t really appreciate the taste, but hey, you get 100 coins either way.
Flotsam Islands
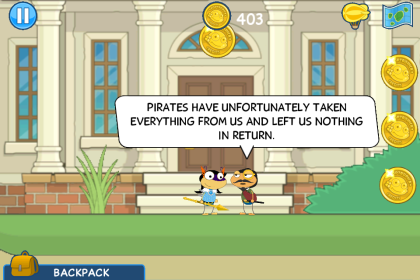
Leave the island group and enter the Flotsam Islands region, landing on the labeled Flotsam Island with the yellow scroll. The townspeople will tell you that pirates have taken over the island and their lousy mayor isn’t doing a thing about it. Go right until you find Mayor Eastman, who says you can scavenge for supplies in the nearby forest.
As you approach the woods, a pirate will stop you. Keep moving right and pick up a Canteen, Sleeping Bag, and Lantern, then head back to town.
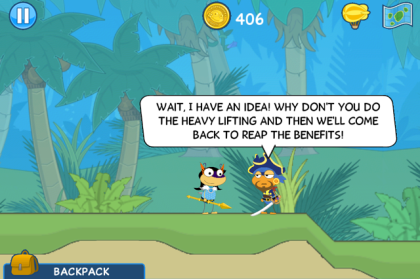
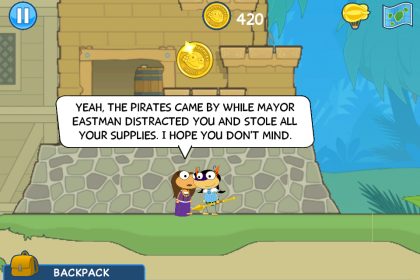
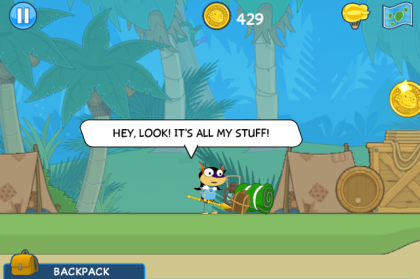
Mayor Eastman will offer to let the villagers take your supplies back to your blimp, although he’s acting very suspicious, and tell you to meet him back at his big house. After he says “they made me do it!”, you’ll hear something. Go back to town to investigate, and Elana will tell you that the pirates came by while the mayor distracted you and stole your stuff.
Now you’ll need to head over to the northwestern island (marked with a yellow scroll). Go right until you reach the pirate camp and take your stuff back. The pirate from earlier stops you again and reveals that his crew will ambush the townspeople when they come over to raid the pirates.
Walk around and locate the five villagers scattered around the island – sarcastic Tommy to the left and everyone else (Zack, Kim, Billy, Elana) to the right. After that, head back to the original Flotsam Island and talk to Mayor Eastman, who says he’s no longer afraid of the pirates anymore. You’ll be awarded with 200 coins along with Artifact 3: Trinity Revenge, plus a blimp upgrade that fends off lethal lightning!
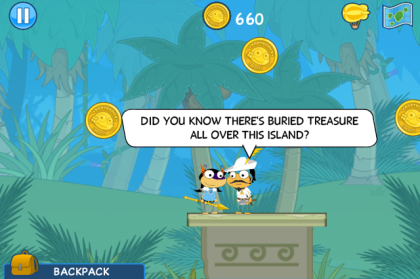
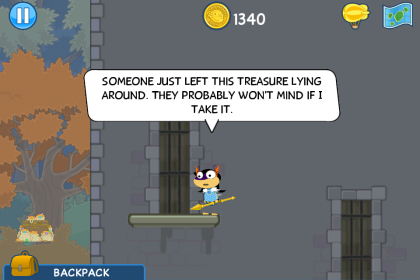
There’s also an island in this region marked by a purple scroll. Talk to the guy in the white Robin Hood outfit and he’ll say he and his colleague (Kiki) are looking for the island’s buried treasure.
Climb up the nearby pillars and you’ll find a Doubloon, head back left for the stack of Gold Coins, and return the treasure to Kiki. You’ll be awarded 100 coins for your efforts.
Gear Islands
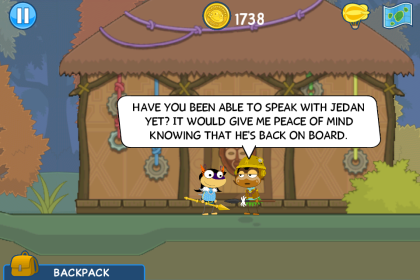
Leave the island group and enter the Gear Islands region to the southwest, landing on the labeled Gear Island with a yellow scroll. Keep moving right, and you’ll eventually come across a guy (Paltego) who will tell you that the island is home to the Restifi tribe of inventors who prospered until the inventor Jedan stopped supplying them with the things they needed.
Continue east and you’ll eventually reach Jedan’s house, which you’ll find is blocked by an electrically-wired gate. Not far off is a dungeon-like place with three power generators. Get to each one and tap or swipe as instructed to power them off. Now you can enter Jedan’s house!
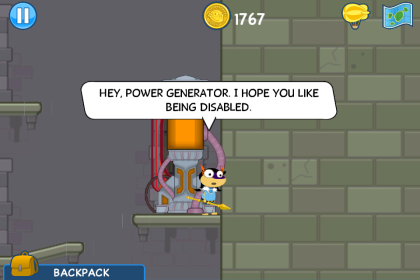
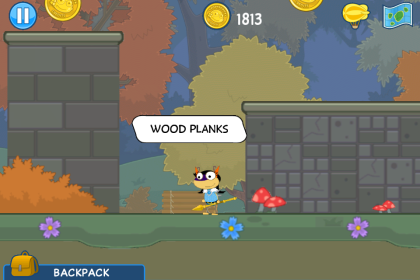
Go inside, and Jedan will not be happy to see you (well, you did just kinda break into his house). Jedan needs your help building a blimp. Go back outside and head left, exploring the woods until you’ve found the Canvas, Rope, and Wood Planks (you may have to go pretty far back). Once you’ve got all that, take them back to Jedan.
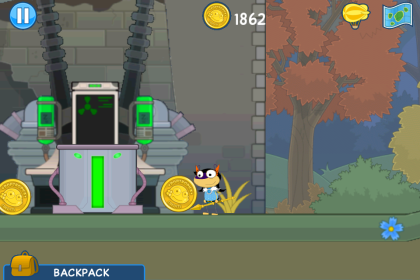
And… now he wants some plutonium, a laser cannon, and a nuclear fission reactor. Definitely not everyday items, and yet somehow, you’ll find them all lying around near the beginning of the island area (so go left). The Plutonium looks like a green tube, the Laser Cannon looks like a little gun, and the Nuclear Fission Reactor is next to a giant machine lined with green tubes. Run all the way back to the right to hand the items to Jedan.
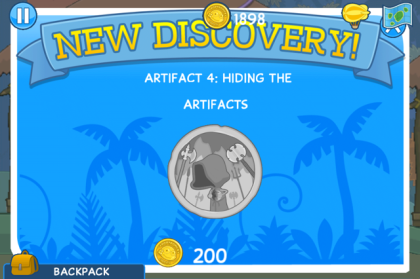
After you give him everything, head back to Paltego, the islander who told you about Jedan earlier. He doesn’t want Jedan to leave because it’s easier to get him to do the work. You’ll receive Artifact 4: Hiding the Artifacts, along with 200 coins.
Go exploring and land on the island with the purple scroll and go right until you find a girl in an aviation suit, who says she’s crashed her ‘flying machine’ and is looking for the missing parts.
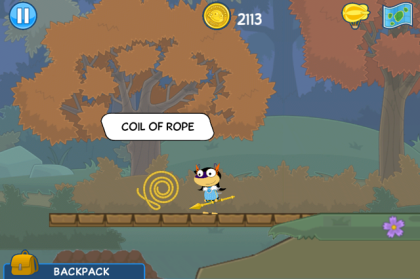
Go left and pick up a Coil of Rope, then hand it back to her. “Amelia” will reward you with 100 coins.
Wild Islands
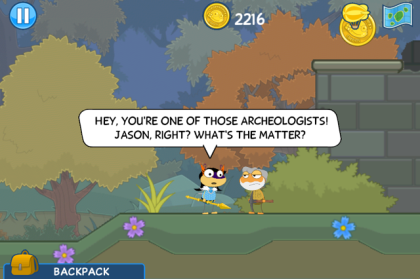
Leave the island group and enter the Wild Islands region to the northeast, landing on the labeled Wild Island with a yellow scroll. As you start exploring, you’ll encounter Jason, one of the archeologists from Giant Island, who tells you his crew has been captured by monsters.
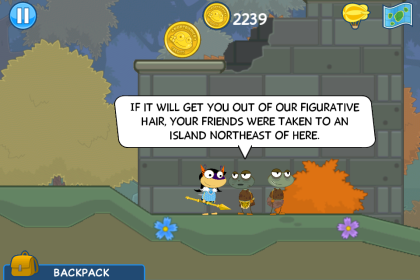
Go right, and you’ll find broken twigs, a tree with claw marks, and eventually, the Mabaya monsters themselves! They’ll tell you that your friends were taken by their leader Mzimuni to an island to the northeast. Head to said island, marked by a yellow scroll.
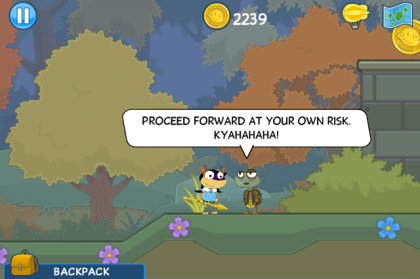
One of the Mabaya will warn you to proceed at your own risk. Which of course you will, ’cause you’re a rebel like that. Jason tells you to infiltrate their base and save everyone while he covers you from a safe distance. Typical Poptropica, you’re always the hero doing everyone’s work while everyone puts pressure on you.
Run right and free the woman (Jackie) from her cage. Yes, despite the lock and no keys in sight, you just manage to break her free. Crazy, right? Moving on, keep going right and rescue Bruce and Terry from their cages as well. Chuck isn’t around, though.

Talk to Jason at the beginning of the island, and he’ll say he saw the monsters take Chuck to an island to the west. Head to said island (marked by a yellow and purple scroll), and go right until you find a Mabaya who once again warns you. Keep going anyway, and you’ll find Chuck in a cage. It turns out that the Mabaya leader, Mzimuni, is right there too and he’s got the keys. The others you freed will show up, forcing Mzimuni to free Chuck. Jason will offer you your reward of 200 coins and Artifact 5: Pirate Invasion!
Go left and you’ll find a guy with a purple scroll above his head who says that making noise will drive away evil spirits. Run right and pick up the Drum and Trumpet, then return the items to the guy.
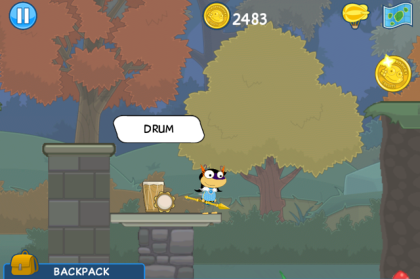
Tap repeatedly to use the instruments and he’ll reward you with 100 coins.
Blue Islands
Leave the island group and enter the Blue Islands region to the south, landing on the labeled Blue Island with a yellow scroll. You’ll meet Taylor again, and it turns out he’s after this island’s artifact too! Keep going right, and one of the lieutenants will be in the way. Swipe back and forth to open his can for him, and he’ll let you pass.
Keep going right until you get to the second lieutenant, who wants you to fetch him the treasure in the castle you just passed by. Head left and you’ll find the third lieutenant blocking the way to the castle. To get around him, just climb the ledges nearby to make your way to the castle’s treasure at the top.
Go back the way you came and give the treasure to the second lieutenant, who will now let you pass. Right. Continue right and talk to the chief native with a yellow scroll above his head, who demands you prove your non-alliance with the Trinity Syndicate by helping three of the villagers.
Talk to the natives and they’ll tell you what they want – blue wood, a personal journal stashed in a blue bush, and you to feed a pet snake near a blue rock. Go exploring and head to the northern island marked by two yellow scrolls. To the right, you’ll find the blue bush. Swipe until the dirt is gone and you’ll uncover the personal journal.
Keep going right and you’ll see the blue tree. Although the items aren’t added to your inventory here, your character will tell you they’ve taken some blue wood for the carpenter. Now head over to the island with the yellow and purple scrolls. Go right until you find the blue rock, and you’ll feed Miss Hiss the snake the food she needs.
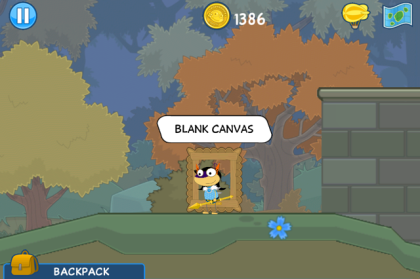
Continue right and talk to the girl with the purple scroll above her head (you’ll have to go around the structure with thorns). She says she wants to paint the blue nature of the island but doesn’t have a canvas. Head left, and believe it or not, there’s a Blank Canvas just lying around for your taking. Give it to the girl and she’ll reward you with 100 coins.
Go back to the original Blue Island and talk to the three villagers you just helped, then talk to the chief, who decides you’re not a Trinity member after all.
Go back to the island you were just on (it’s to the west), which is where you’re told the artifact is. Run right until you get to the guard, Monaco, who will now let you pass. Not far away is a cave containing Artifact 6: Mainland Greed (and 200 coins). Congrats, you’ve found all the artifacts!
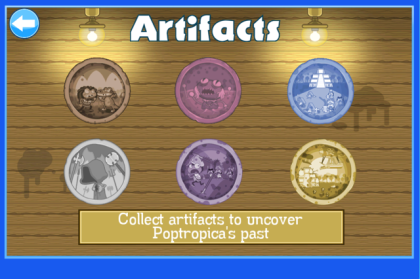
If you view all your Artifacts from your blimp, you’ll see that they tell a story of Poptropica’s past:
- Giants and monsters compete for territorial dominance over a primeval land.
- Poptropicans who fled underground to avoid the great flood emerge many years later as The Mabaya.
- Seafaring Poptropicans form the Trinity Syndicate and conquer the mainland Poptropicans who drive them away.
- Monks hide the artifacts away during the war between the Trinities and the mainland Poptropicans to avoid their destruction.
- Seafaring Poptropicans return to their homeland after the great flood only to be driven away by greedy mainland Poptropicans.
- Pirates attack the Trinities and drive them away from their homes.
Other islands
There are still a few other island regions on the map where you can play purple-scroll quests just for fun, which do not earn you any artifacts. You can even replay them for more coins just by revisiting.
Smooth Sand Islands
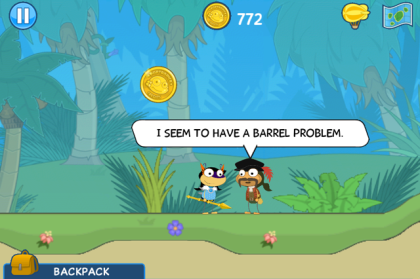
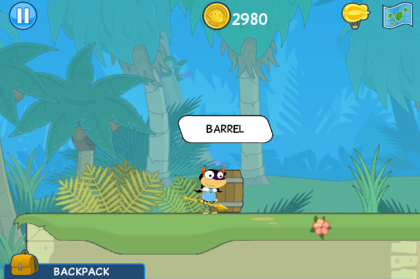
Land on the island marked by a purple scroll. A merchant will tell you he’s got a problem – he’s missing his two Barrels. Go to the right, and you’ll find one of the barrels on a pillar, and the other on the ground. Return to the barrel shop merchant and he’ll reward you with 100 coins.
Four Winds Islands
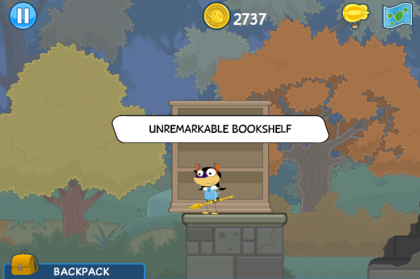
Land on the island marked by a purple scroll. A sleepwalker will tell you he’s misplaced two furniture items. Go to the right and pick up the Basic Chair and Unremarkable Bookshelf. Return them to the man and he’ll reward you with 100 coins.
Castaway Islands
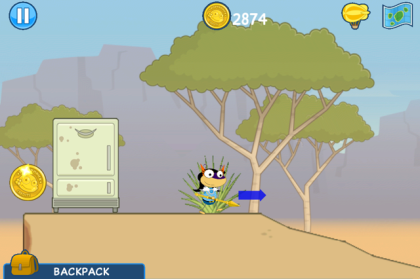
Land on the island marked by a purple scroll. A man will tell you he needs a way to keep his ice pops cool. Hop to the right, and against all logic, there’s a working refrigerator smack in the middle of this desert land. (Seriously?) Return it to the hothead, and he’ll reward you with 100 coins.
New Palm Islands
Land on the island marked by a purple scroll. A merchant will tell you he’s got a problem – he’s missing his two Barrels. One of them will be to the right, the other to the left. Return to the barrel shop merchant and he’ll reward you with 100 coins.
Most island regions will also have small unmarked islands you can explore to see what you can find, collect more coins, or just jump around as much as you like. Safe travels, adventurer! 🙂

I wished there was something about Monster Carnival in the app, but there wasn’t.
😦
So did I, oh well
Thanks,Fishy!I already accomplished this,though.How was this,incidentally?
My account is Shaggy Crown,btw.Hooray for SCs! 😀
I thought it was okay; it had a good story but the actions were a bit repetitive, mostly fetch quests. I got the name Blue Tooth the first time I played it and Angry Bird the second time. 😀
Yeah,agree on the quests.I wish more Poptropicans were there,though.And congrats on getting Angry Bird! 😀
yeah ummmmm i cant play dis thing cuz i dont hav it . bummer…..
For the Amelia part,I only had to collect a screw.
And in Smooth Sand,I found a girl ready to move her house (no one else seems to be there though).
Probably because they moved. LOL
There should be at least the mover’s house before she moves,andd she doesn’t actually move at all.
Has anyone noticed that some males have beards but really have lipstick? 😮
Oh, yeah.
urrmm seriously? thats kinda wierd i dont hav it so i cant laugh out loud 😦
I got Invisible Snowball. No CS. ;-(
What it needs is a unlock code for an outfit on Poptropica. Maybe a Mabaya or Trinity costume.
YES IT DOES
How do we get the code,anyway?
Nice guide slantedfish, I’ve been working on a detailed guide for my blog too. The game is fun though, I sometimes get distracted and forget to catalog everything haha
Thanks, and good luck with yours! There was quite a lot to document. 😛
no monster carnival.waah
i wish had a ipod or ipad or iphone
Oh, man! I came to this website hoping to find that I missed something on the app that allowed me to attack the Mabaya or something better than what happend in the game.
I have all the artifacts what do I do now
Slanted Fish: There’s not much else to do, but you can replay some of the quests on the purple scroll islands to earn more coins.
i dont get the part about the big tow thing ?
Big Tow sounds like ‘Big Toe’ 😀
Why aren’t these islands included in the original? They should be, even if they were Forgotten.
i know riht i just told fishy that i cant play it cuz i dont hav it . you hav it invisible dolphin? just asking
oh merry christmas poptropica help blog you deserved it for hlping us merry christmas again um fishy were do you live?
Thanks, and merry Christmas to you too! See the About page for more information about all the PHB authors. 🙂