
Synopsis
An abandoned space station. A missing astronaut. A signal from beyond the stars. Blast off for a Poptropica adventure like no other! Get ready to explore the secrets of the lunar surface, and uncover a mystery as old as the cosmos…
For walkthroughs on Lunar Colony Island, scroll down.

or September 6, 2012 (for all)
Common Room: Final Frontier Gift Shop
Preceded by: Wimpy Boardwalk Island
Succeeded by: Super Villain Island
Resources on this page: Island Extras | Synopsis from Poptropica | Video Walkthrough | Written Walkthrough | Album Photos | Trivia
Island Extras: Map | Official Tour | Videos | Chapter Book | Poptopics Book | PHB Ramble Review
Video Walkthrough
For a written walkthrough with pictures, scroll down on this page.
Written Walkthrough
Walkthrough written by Cool Bite & Slanted Fish
Special thanks to PopBuddies
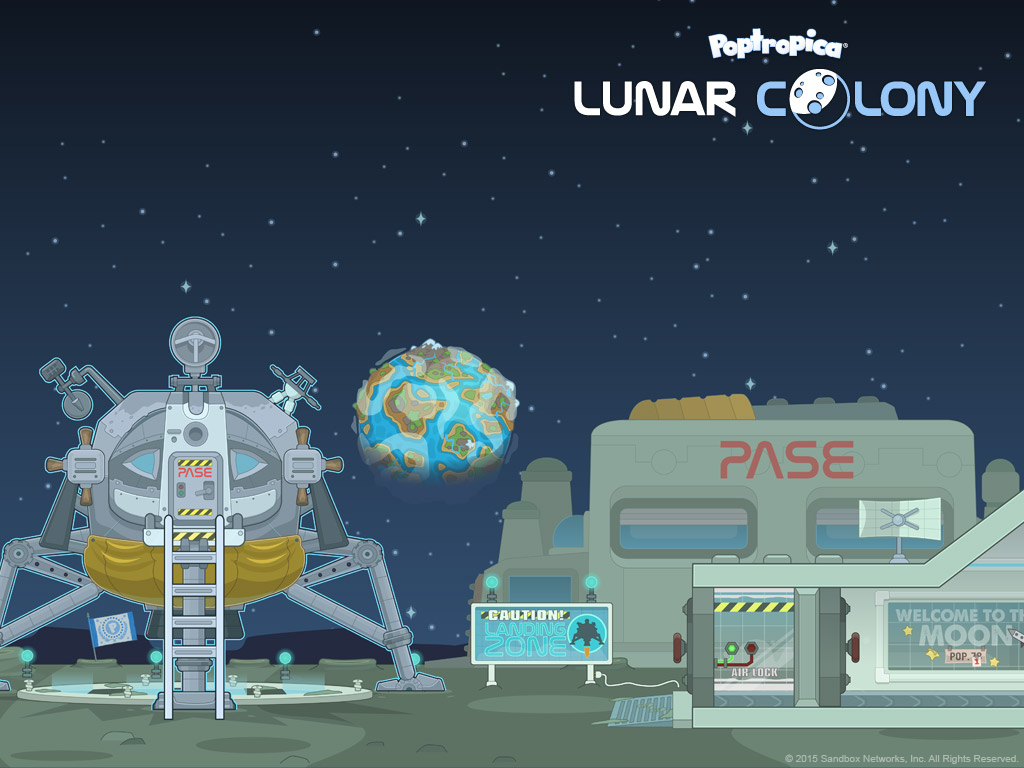
Welcome to Lunar Colony Island – an astronomical adventure awaits.
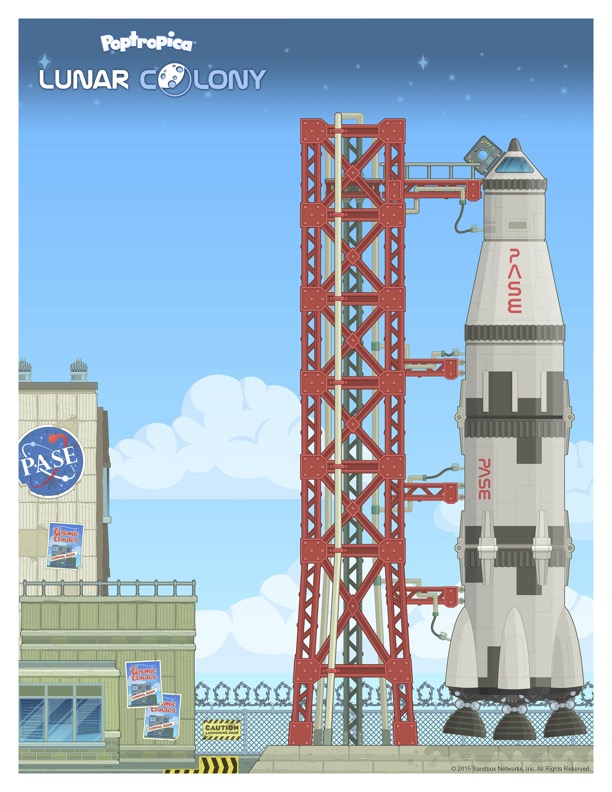
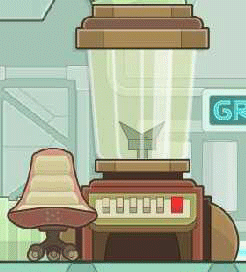
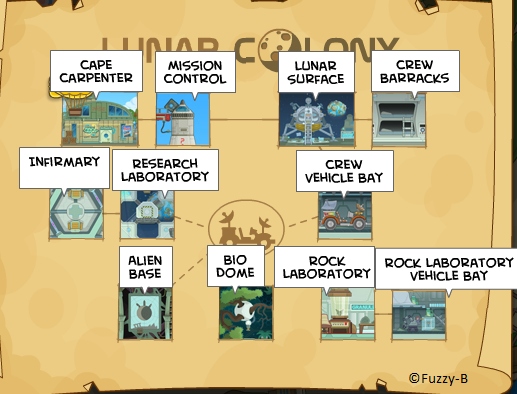
Run all the way to the right and go to Mission Control. Enter the Poptropica Academy for Space Exploration building (PASE – a parody of NASA). Talk to the old guy. Then the flight director will come in and ask you to find something for the astronaut’s stomach.

Exit the building and go back left to where you came from (Cape Carpenter on the Map). The astronaut’s table now only has a lone bottle of Ginger Ale for you to take.
Return right to Mission Control and head straight to the elevator. Push the down button and the elevator will arrive in front of you. Hop on, push the up button, and up you go to the spaceship.

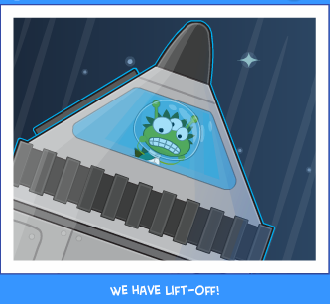
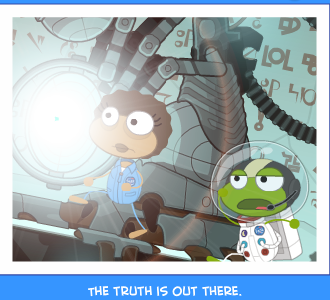
There’s a sick astronaut inside the spaceship. Give him the Ginger Ale, and he’ll feel better. He leaves the ship and locks you in. Pick up the mic on the right and the flight director will talk to you.
You don’t know how to fly a spaceship, but don’t worry, he’ll give you instructions. Sit tight ’cause this is gonna be a bumpy ride!

In the Spaceship
You first have to adjust the booster rockets. Set each to 4,150 pounds of thrust. Fuel tank 1 running low. When it reaches 5%, activate fuel tank 2 and release fuel tank 1.

To clear the earth’s atmosphere, use the steering mechanism to adjust your angle to 112 degrees. Release the second fuel tank and enjoy the view. Space sure is beautiful. If I were in space, I would go to the moon.
Among the Asteroids in Outer Space
Ahh! Asteroids! Don’t let them destroy the ship! Your next step is to guide the ship to the moon base. To navigate, move the cursor up and down in the direction you want your spaceship to move. Of course, remember to watch out for asteroids! Very scary.
It turns out that the first asteroid had damaged your fuel tank! Get the toolkit out and go over to the damaged part at the bottom of the spaceship and spread glue all over it. There, that should do the trick.

Lunar Surface
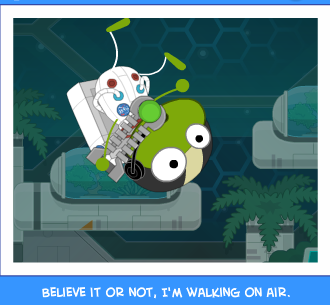
Use the cursor to rotate the lunar lander and hold the mouse button to use the boost. Keep your speed and angle under control and make sure to land on the landing site. Now you are on the moon. Go right from the landing zone and open the airlock system. Enter the Vehicle Bay.

Go up to the open locker in the center to take the Operator’s Manual, then leave.
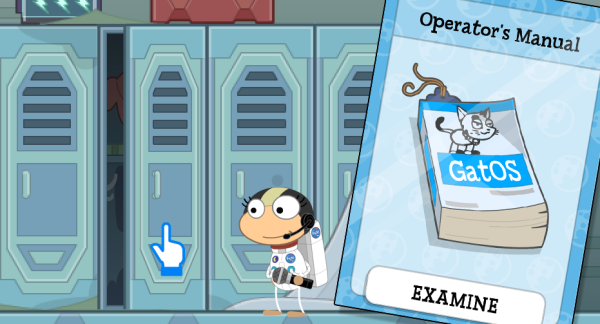
(Fun fact: GatOS from the manual’s cover is a reference to GLaDOS from the Portal games.)
Crew Barracks
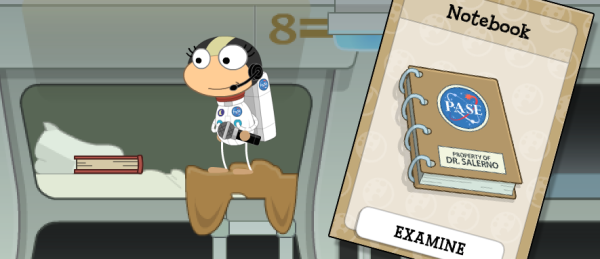
Go inside the Crew Barracks and collect the Notebook on bed 8.
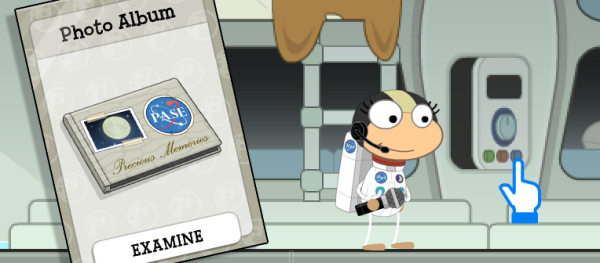
Optional: You can also get Salerno’s Photo Album by clicking on the open storage space near the bed with the Notebook. It’s a scrapbook you can flip through.
Take out your manual and find the code for Reboot. Type the code on the computer, which is on the floor above. The buttons in order are: second row right, third row left, second row left, and finally fourth row right. It will reboot.
Drag the blue lever on the side up to “Open.” Close when it says the inner airlock door is opened.

Vehicle Bay
Go back to the Vehicle Bay, where you got the Operator’s Manual. Test the doors, then go up to the top platform and click on the button with a sun on it. The ceiling will open to let in some sunlight. Adjust the lights to the vehicle (rover) at the bottom by dragging the solar panels around the room to shine a light in the direction of another panel, until the light reaches the rover.

The rover will then charge up, so hop in the rover and get out of the building. You can use this vehicle to drive around the surface of the moon! Tip: When driving, click to jump.
Research Laboratory
Drive to the Research Laboratory, located in the top right corner of the map.
When you exit the rover, you’ll see a meteor blocking the entrance to the left. You’ll need to get it out by taking the hook on the back of your rover and connecting it to the meteor. The rover will then pull away and the meteor will be moved, allowing you to enter the lab.

Enter the laboratory and go to the eye-color changing station on the right. When you are in the eye-color changing station, you can choose any eye color you want, and your eyes will change to that color. You’ll want to pick purple.
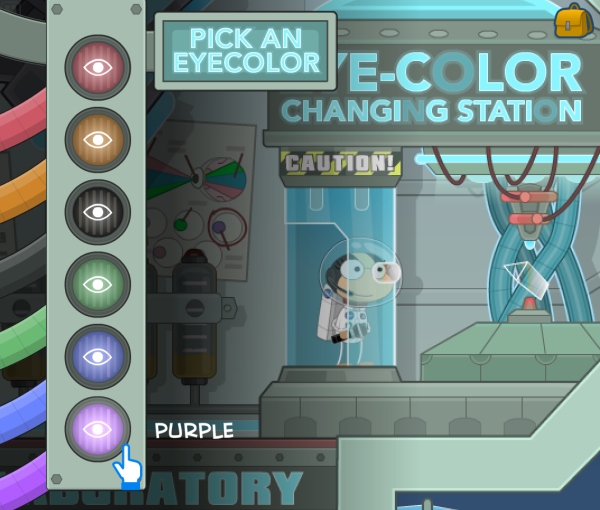
According to the research machine, purple eyes will allow you to bypass eye scans, which you will need later, so make sure to change your eye color to purple.
Infirmary
At the top of the Research Laboratory, you’ll find the experimental pressure chamber. Hop in and set the dial to High. You’ll end up looking flat like a pancake, but only for a short period of time.
Your new size allows you to squeeze through the tiny gap on the bottom left, where you’ll need to jump over the blocks. Enter through the door to the Infirmary.

You’re now in a circular maze. Click on the hose to walk around with it, but be warned, you only have a limited amount of hose before you run out. The blue-purple markings can be passed through, while the gray-green is solid wall you can’t go through.
Take the hose and jump up to the blue-purple on the left, then the one on the top left, top center, walk to the trash can and jump up, pass the orange seat and go left, go past the blue oval through the right, drop down past a blue circle, and you’ll be in the maintenance shaft.

Put the hose to the exhaust pipe, and out pops the Locator Device from the vent on the right! Pick it up, then exit through the Bio-Waste door on the left.
Now leave the building on your rover, and a little red dot will appear on the bottom left of the locator device, indicating that Salerno is inside the Bio Dome. Go there.
Bio Dome
Drive to the Bio Dome, and when you get there, you will be floating in zero gravity.
Float over to the emergency cork dispenser and grab a cork. Click on the cork to carry it. Find the open pipe above and click on it to block it with the cork. Do the same for all the open pipes. Watch out for the wind they blow, which can send you and your cork blowing away.

Once you’ve blocked all the pipes, float to the ceiling and climb up the ladder. There’s a pair of feet dangling to your upper right, and you’ll need to click on them to get Salerno out of hiding.
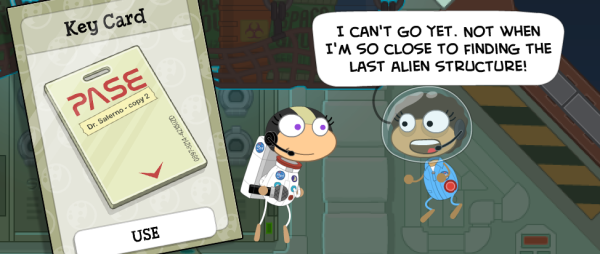
She’ll say she can’t go home yet because she is so close to finding the last alien structure. She’ll refuse to come with you and will escape. Pick up the Key Card in the lower right, and leave the Bio Dome.
Rock Laboratory
You’ll chase Salerno’s rover all the way to the Rock Laboratory. At the entrance, you’ll need to scan your eyes, and if they are purple, you will be granted access! Enter the lab.
First, set up the movable floors to bring yourself all the way down, then go right and continue setting up the movable floors to bring yourself all the way up.
As you go up, feel free to check out the many experimental moon rock stations just for fun (animated gifs courtesy of Poptropica artist Nasan Hardcastle):
The Purification Station…
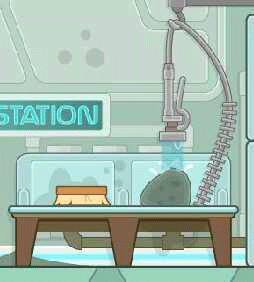
Pulverization Station…

Incineration Station…

…and Granulization Station.
Whoa! Lots of stations there. When you reach the top, go right and enter through the door.
Rock Laboratory Vehicle Bay
It turns out Salerno gave you the slip by attaching her locator device to a robot! However, the PASE director tells you to look around for something of use. Climb up to the top and uncover the masked item, which is a Geiger counter!
Then the rover comes for you, but you can’t push it over the edge because you don’t want to break it. Go over to the poles and push one down to create a ramp. Push the Geiger counter down to the ramp and exit with the rover.

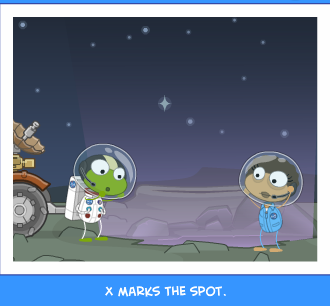
Alien Base
Now the red dot is in your upper left (below the Rock Lab) and when you drive there, there will be a purple X poking up from the ground. Click to examine it, and at this new location, take the hook from the back of your rover and attach it to the purple alien object, like you did with the meteor blocking the way to the research lab. (Note: There are two other alien structures on the lunar surface; one is yellow and the other is green – but you have to be at the purple one, which has yet to rise.)
This alien rock structure will grow into a tall monolith and shine a beam of light.

Climb back into your rover and follow the purple beam and you’ll soon find a red beam forming an X with it. Click to enter at the midpoint.

Walk over to the little mound where the lights cross, and Salerno will come over. She tries to dig there, and the ground starts shaking. Then it breaks and you both fall in!

Something opens and you follow the path with Salerno behind you. You come across a picture and Salerno does not know if it’s safe or not, but it’s too late to turn back! There’s a switch on the right, so go over and click to see what it does.
The ground starts shaking and the circle turns out to be a portal to the alien world. Salerno insists on going, so she leaves through the portal, but the flight director takes you home.

Mission Accomplished
You’ll arrive back on earth in the PASE building, and the girl in the ponytail will tell you that Salerno never stopped exploring and the old guy gets a transmission! He plays it on the screen, showing Salerno holding a sign that says “Mission Accomplished”! She really did it!

Director McNabb comes in and gives you the island medallion and credits for the Poptropica Store. Congratulations fine astronaut, you have completed your mission on Lunar Colony Island!
Bonus quest (members only)
For Poptropica members only, you’ll get to play a bonus quest where you’ll get to work with Alan Turing, a computer scientist (though in real life, he already died back in 1954!). Anyway, PASE has gotten another signal from Salerno, but they can’t decode the message and think the retired Alan Turing can help. You’ll receive the Alien Codes.
Go to Cape Carpenter, which is on the left of Mission Control on the map, and when you arrive in front of the Final Frontier Gift Shop (the common room for this island), take the bus to Shady Pines Retirement Village. Click on the door to the right to examine the names of the residents.
You won’t see Alan Turing’s name right away, so you’ll need to decode it. It is simply an anagram, so click on the name with the exact same letters as “Alan Turing” until it is rearranged to spell out his real identity. (Spoiler: it’s “Grant Luina.”) When you find it, click the button next to it (3A).

Alan agrees to help, and both of you will go back to Mission Control. He tells you that the letters on the slide rule are in a pattern based on the frequency the message came in on.
First you choose a letter on the slide rule, for instance “A.” Then click on a space in the cipher pattern to reveal a possible place where “A” is in the message. Arranging the letters on a cipher in an elementary pattern should reveal the message.
So locate “A” on the slide rule and click on the first section of the cipher (looks like a tic-tac-toe). Then find “B” on the slide rule and click on the section next to A, and so on and so forth for the entire alphabet. At the letter J you move on to the next cipher pattern (looks like an X) and continue to place letters. As you locate what each letter should look like when it is decoded, the message will start decoding. Eventually you will have decoded the message.

But that’s just one! The next message will then be printed, and you’ll need to start the decoding process again, for a total of four times. Don’t worry, you get a break in between messages to admire the alien transmission you’ve uncovered. Spoilers below for the messages:
- fourteen minutes thirty-nine seconds / right ascension / minus sixty degrees / fifty minutes declination
- five hours fifty-five minutes / right ascension / seven degrees / twenty-four minutes declination
- six minutes forty-five seconds / right ascension / minus sixteen degrees / forty two minutes declination
- two minutes thirty-one seconds / right ascension / eighty-nine degrees / fifteen minutes declination
Congratulations, you have completed the bonus quest for Lunar Colony Island. Head back to the blimp on Main Street to visit other islands and begin new adventures. To infinity and beyond!
Looking for more walkthroughs? Check out our Island Help page! 🙂
Album Photos
These pictures appeared in a former feature known as the photo album.
Trivia
- Lunar Colony Island is Poptropica’s 29th island. The countdown began on August 10, 2012, and was released on August 16 for members with a demo for non-members. It opened to all on September 6, 2012.
- PASE, which stands for the Poptropica Academy for Space Exploration, is a parody of NASA.
- The Photo Album in the open storage space next to bed 8 in the Crew Barracks is optional, but you can flip through Salerno’s scrapbook of memories just for fun.
- Common room: Final Frontier Gift Shop
- GatOS from the Operator’s Manual found in the Vehicle Bay is a reference to GLaDOS from the Portal games.
- Alan Turing, who appears in the bonus quest, is an actual British cryptanalyst.
- Bonus quest for members only: You’ve returned to earth just in time to receive a new transmission. Can you crack the code and translate the alien message?
- Members get an additional Lunar Colony gear pack, which includes Zaggy Moondust costume, Alien Archaeology power, and Moon Rock item. The Zaggy Moondust costume is ONLY available during Early Access! (Zaggy Moondust is a parody of Ziggy Stardust, which was English rock star David Bowie’s alter ego.)
- Hanging down sideways from near the top of the Mission Control building is the Poptropica flag.
- On the lunar surface, you can see a view of planet Poptropica, which is based on a real photograph called “Earthrise,” taken by the crew of the Apollo 8 mission.

I just realized that maybe the purple “X” is a ‘X’ Files reference…? EEEEEE!!!
Okay I’m having a problem getting it to 112* because all I keep getting is 112. I’m confused as to how to get it to just 112 and not 112.
me too! i keep getting 112. instead of 112
does anyone know how to keep purple eye color
well each time i put it on 112 it just keeps saying that i have to put it on 112 even though its already there
there are symbols from mission atlantis and (probably) atlantis!!!!!
i don’t know if this is important, but you have to talk to the young lady, not the old guy … at least, that’s what i did.
Yes, you do.
So you can send transmissions to Earth from alien worlds? I wonder how Salerno is faring there.
im stuck at 11.6 degrees wth help
it will go 11.6 or 113
lol nevermind got it… jut had to swing the mouse around randomly
AND NOW IT SAYS IT ISN’T 12 DEGREES???????? other islands here i come…
That’s my problem as well! What do you mean by swinging the mouse around randomly? It kept getting stuck on 11.4 and 113. Why is this happening?
SOMEONE HELP ME PLEASE!! I’m stuck too! Does it mean I can’t do the island? 😦
And then I finally got it to 112.° but as most people have said, it’s not working. I have refreshed it a total of 3 times now, going onto the fourth refresh. I’m determined to finish all the islands! 😛
Same thing happens to me! I can’t do the island now and it looked really good…
Redoing this island on one of my accounts that I haven’t finished this on yet and I NEVER knew about that photo album woah. Time to get it on my other accounts 😛
Yeah, the photo album is a pretty unique feature! They were introduced with the Friends feature in 2013. 😀
how do you stop it from glitching on the 112 degrees part? somebody please please help me!
😦
The part about PASE losing their funding sounds like when NASA had their space program budget cut during the Nixon administration. That was when they developed the space shuttle because it was reusable.
I don’t know if anyone’s here, but I can’t get around the 112 degrees glitch. I have tried different computers, different browsers, restarting, etc. Does anyone have another fix? How long has this glitch been present? Why doesn’t it have a patch yet?
Neither can I!
I cannot get the purple X to show on my screen. HELP!!!!
Make sure you’re at the right place on the map!
Am I the only one who found it creepy that the old man and lady were just lifelessly stairing out the window at that place of which you get by bus in the bonus quest?
I want to live on the moon now.
The beginning and the middle was the best part, but the end was pretty boring…
anyone got stuck when they found solerm and now it just has the loading mark. arggghhh Im so annoyed
I can’t even get into the space shuttle there is no elevator up and you can’t jump up
I had great fun buzzing the lunar colony with rockets at full blast and he still said it was a textbook landing lol
I can’t adjust to 112 degrees, just 113 or 111.5
For some reason, the angle doesn’t want to go to 112 degrees. Just 111.7 and 113 lol